One of the best things that you can do for your oil tank is install a Smart Oil Gauge. It will alert you when your tank is running low on oil and when you need to buy some! Buying the gauge will also give you the freedom to buy oil whenever you need it. This will ultimately save you hundreds of dollars a year that would normally be spent on automatic delivery. The gauge will also show you how much oil you are using per day, week, month, and year. This will better help you conserve your heating oil.
With all that said, when you go to install your smart oil gauge on your tank, you’ll notice that you don’t have a spare fitting. While very uncommon for this to happen, you’re not entirely out of luck just yet. In this blog post, we’ll cover what to do if you don’t have an extra fitting to plug your gauge into.
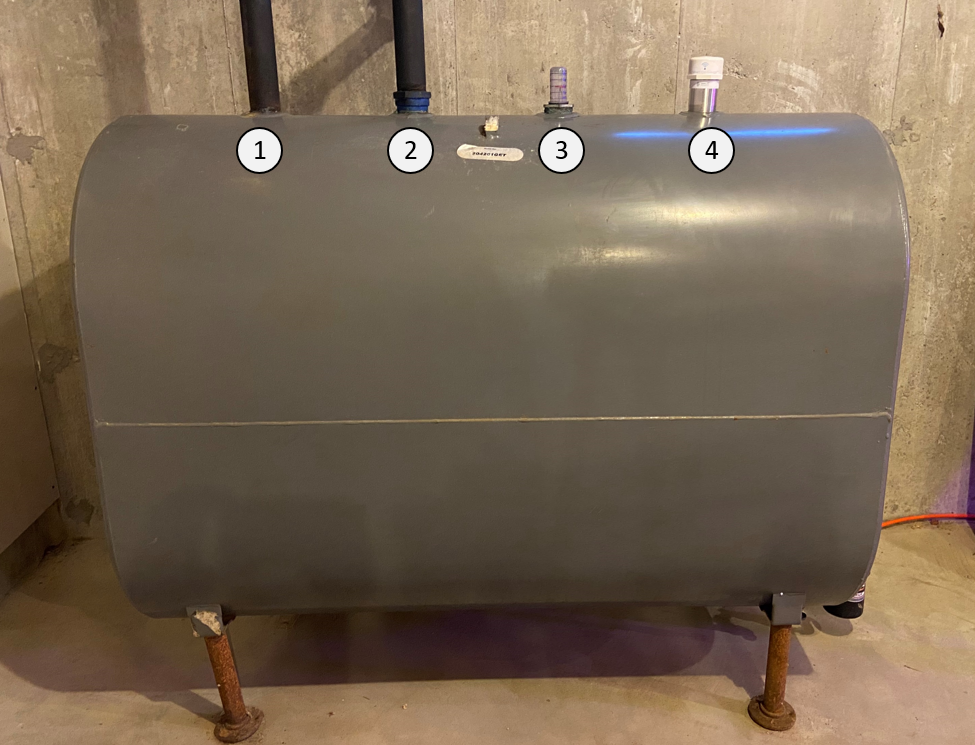
Overview of a Heating Oil Tank
Typically, most heating oil tanks have 4 openings on the top:
- The opening for the fill pipe. The driver will pump oil into your tank from this opening.
- The opening for the vent pipe. This is where air will enter and leave the tank when you fill it up. Sometimes this pipe will include a float gauge alongside it.
- The opening for your float gauge.
- An extra opening. You can use these extra openings to install additional gauges or equipment. Second tanks will also sometimes be connected to the main tank using these fittings. Tanks that are top-fed will also usually be set up using one of these fittings. That usually means that instead of oil coming out of the tank from the bottom, it’s drawn from the top. That is commonly found in outdoor tanks or tanks that are hard to access.
Where Should You Install the Smart Oil Gauge if you only have Three Fittings?
If your tank only has three openings, you’ll have two options on what to do. Whichever way you decide to go will be different depending on your tank.
Orientation #1: Fill Pipe / Vent Pipe / Float Gauge
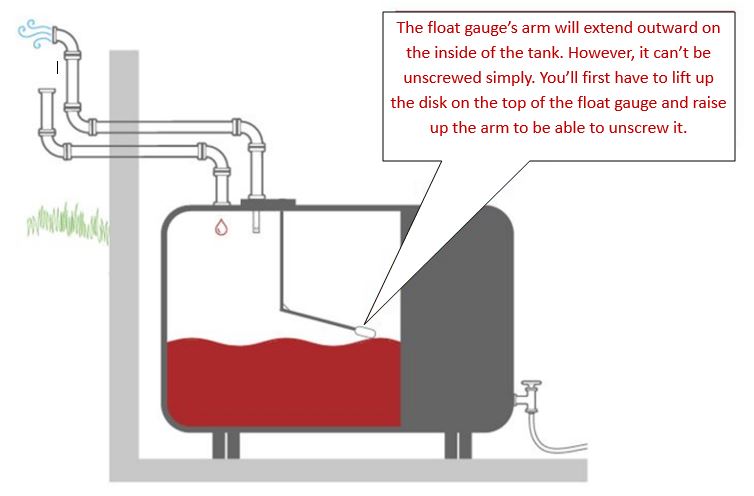
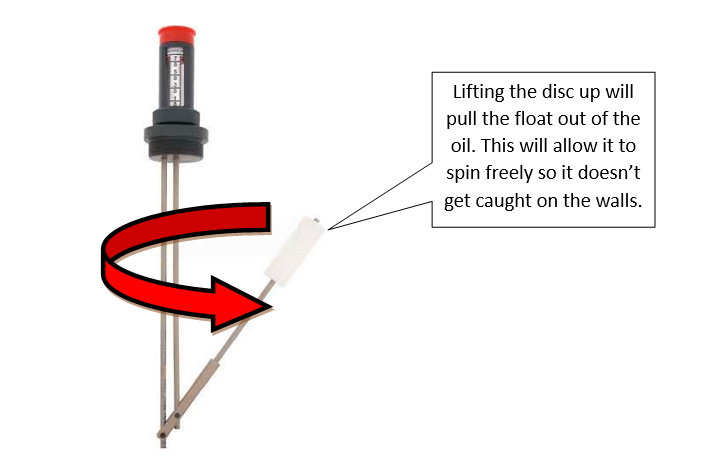
If your openings are as follows: Fill Pipe > Vent Pipe > Float Gauge, then you’ll most likely have to remove the float gauge on your tank. However, removing said float gauge can be a little bit annoying. You can’t simply just unscrew the float gauge because its arm will crash into the interior of the tank. We go over replacing your tank gauge in depth in this blog post here. You can use that as a guide to remove your float gauge.
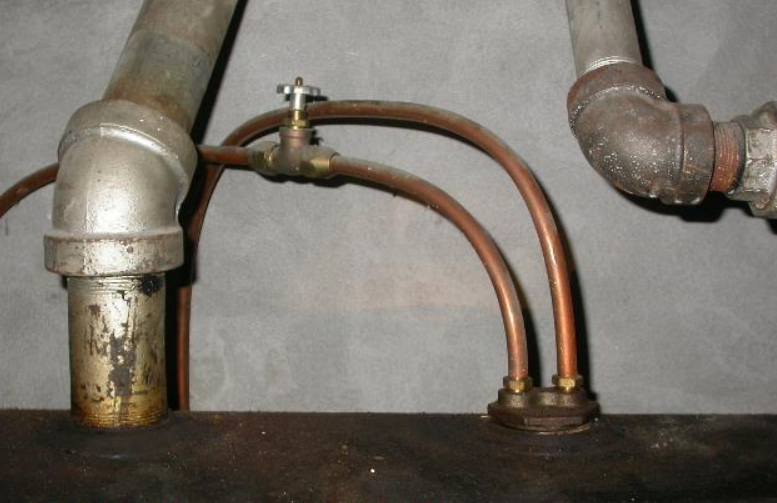
Orientation 2: Fill Pipe / Vent & Float Gauge Combo / Top Feed Oil Lines
It’s more common for oil tanks to have their feed lines on the bottom of the tank rather than the top of it. However, oil feed lines can sometimes be located on the top of the tank. With Roth double-wall tanks, the feed lines are always on the top of the tank. However, for some Granby steel tanks, you can find them located on the top. One important note to keep in mind for these setups is that your tank will never be truly empty. This might sound odd, but this is because when the feed lines are at the top of the tank, they can’t reach the bottom of the tank completely. This normally leaves a little bit of oil on the bottom of the tank. Think of it like a straw that can’t reach the bottom of a large cup.
If your feed lines are on the top of the tank and you wish to have them moved to the bottom of the tank, then you MUST have a technician come out and move the location of the lines for you. This is NOT something that the average homeowner is capable of doing. The technician must first create a vacuum inside the tank to remove the tank’s plug without all of the oil spilling out. They must also be able to ensure that there is not a large buildup of sludge on the inside of the tank. This is often the last resort for your oil tank, but it can open up an extra fitting on your tank allowing for the installation of the Smart Oil Gauge.
What’s the Bottom Line When Your Tank Only has Three Fittings?
The Smart Oil Gauge is a fantastic tool to have for monitoring your heating oil levels and usage. A lot of folks will tend to go to some great lengths to install one onto their tank. Luckily, you can remove the float gauge from your tank fairly easily. We have a guide on how to do so right here.
But, if you need to relocate your feed lines, we recommend that you contact a local HVAC technician to do so. Waiting until they’re at your home for a major reason to ask them is a smart idea. That way, you don’t have to request a consultation every time that you have a question. They will be able to tell you if they can move the feed lines to the bottom of your tank.
If you’ve decided to take off your float gauge from your tank, you’ll then need to see how the gauge is installed. Follow the steps in our steel tank installation tutorial to get the gauge installed onto the tank!
Happy Heating,
Hunter

