One of the best things that you can do for your heating oil tank is to install a Smart Oil Gauge. The Smart Oil Gauge will alert you when your tank is low and notify you that oil needs to be delivered. It will also give you the ability to only order oil when you need it! That way, you’re in control of your deliveries! This will help you save a significant amount of money in the long run. Finally, this gauge will also help you preserve heating oil and allow you to see how much oil you are burning.
But, none of this will matter if you can’t get it installed! Especially if your tank has only three fittings in the tank. However, you’re not entirely out of the game yet. There are still a few things that can be done to ensure you install the Smart Oil Gauge correctly.
The Typical Heating Oil Tank
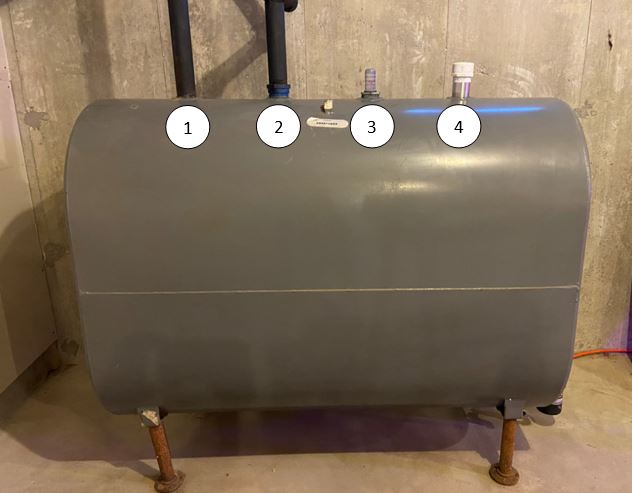
Usually, a typical heating oil tank will have four openings on the top of it. However, sometimes you will see tanks have three fittings. The four fittings on the top of the tank are normally used for the following:
- The Fill Pipe Opening: This is where oil pumps into the tank from the delivery truck
- The Vent Pipe Opening: This is where the air leaves the tank when you are getting a fill. The tank’s whistle is usually located here.
- The Opening for the Float Gauge: This is often the fitting where the float gauge will sit on the tank.
- The Extra Opening: Tank installers will often use this fitting to connect a second tank. However, you might also see feed lines being installed on these openings instead of on the bottom of the tank. This will allow the oil in the tank to be drawn out from the top instead of the bottom. This is usually pretty common on outdoor tanks, or on tanks where the bottom isn’t easily accessible.
Where Should You Install the Smart Oil Gauge with only Three Fittings?
If your tank only has three fittings, you’ll have a few options to install the gauge. Whichever way you decide to install it, will depend on your tank’s setup.
Orientation 1: Fill Pipe/Vent Pipe/Float Gauge
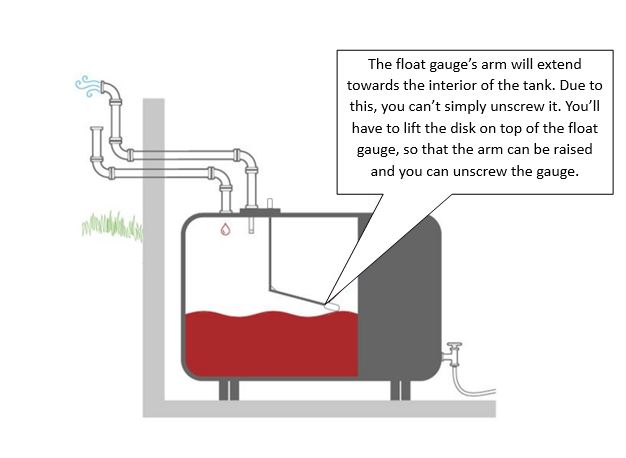
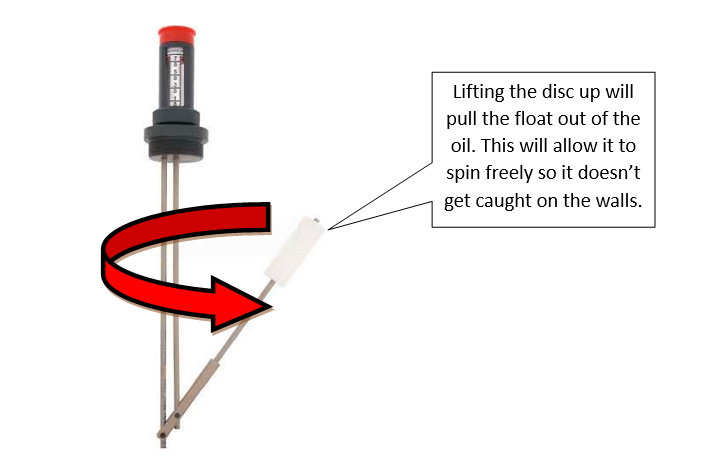
If your tank’s orientation is the following one, then this one has the simplest solution. All you will have to do is simply take the float gauge out of the tank and replace it with the Smart Oil Gauge. Removing the float gauge can be a little difficult, but it’s not completely impossible. However, removing the float gauge isn’t a simple task by any means. By just unscrewing the float gauge, the metal arm will crash into the side of the tank and possibly damage both the arm and tank. For removing the float gauge, follow our step by step guide on how to do that here.
Orientation 2: Fill Pipe/Vent & Gauge Combo/ Top Feed Oil Lines
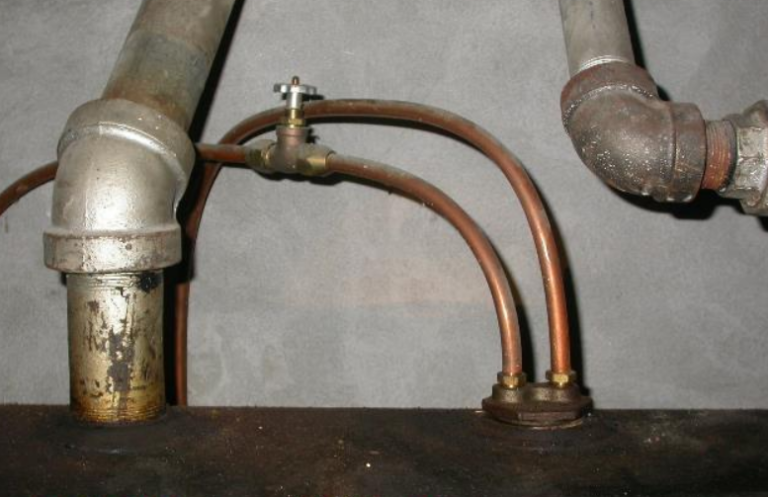
Most oil tanks will often have their oil feed lines installed at the bottom of their tank. However, sometimes you can find their oil lines installed at the top of the tank. It’s important to note that for Roth tanks, this is always going to be the case.
If your feed lines are located on the top of your tank, you’ll have to have an HVAC technician come out and re-locate the feed lines to the bottom of the tank from the top. This is NOT at all something you should try to do. The technician will have to create a vacuum in the tank to remove the plug so that you don’t lose any oil in the tank. Sometimes, the technician might have to drain the tank to be able to move the feed lines. The technician will then have to determine that there’s no sludge at the bottom of the tank and clean up any if necessary. This is normally a last resort, but this is usually the only way to open up the fitting to use the Smart Oil Gauge.
What’s the Bottom Line?
The Smart Oil Gauge is a phenomenal tool to monitor your oil level and usage. Especially with the inclusion of the Smart Oil Gauge Duo! Getting one installed onto your tank will be an incredible asset! Using our guide to removing the float gauge, you’ll be able to remove the float gauge with ease.
But, if you need to re-route your oil lines, we recommend that you wait for your HVAC technician and asking for a consultation first. They’ll then be able to tell you if moving the lines to the bottom of the tank is possible or not.
Happy Heating,
Hunter

