John D Rockefeller is a name that might ring a bell. He was the nation’s first billionaire and the founder of the Standard Oil Company. It was a dominating force in the American oil industry and became one of the first big trusts in the nation. During this time, he was a very big advocate for Kerosene oil. Not only did he personally use it, but he also revolutionized the oil industry by pushing for Kerosene during the early 1900s.
But why do I bring this up? Nowadays, kerosene isn’t as popular as heating oil. However, it’s still used today not only as a way of heating, but also for jet fuel, as it is derived from crude oil. In this article, I’ll be going over what you need to know about it, such as the basics and what’s important.
What Exactly is Kerosene?
Like all fuels, Kerosene is a combustible liquid that is used for heating. It’s got a flashpoint of 100-150 degrees Fahrenheit. But it will also gel when the temperature gets around or below -40 degrees. This is vastly different from heating oil that’ll usually starts to gel around 16 degrees Fahrenheit. Unlike heating oil, you can store it in much colder environments.

There are, however, different grades of kerosene. The two most common grades are 1-K and 2-K grades. They have a few differences and will burn somewhat differently. 1-K, for example, is often known to be cleaner and has fewer toxins and deposits. This makes it more suitable for use in lanterns. However, this tends to be a more premium form of Kerosene. However, 2-K grade is considered the standard and is the form that’s often used for heating with indoor heating and stoves.
What Do You Use Kerosene For?
In the 1800s, Kerosene was used as a form of powering light fixtures. Back then, it was very popular; however, once heating oil entered the market, prices for kerosene eventually dropped as heating oil became more popular. Another killer for kerosene was the introduction of electric heat. As it became more common, the use of kerosene lamps dwindled due to their need for fuel, which electric lamps didn’t need.
In today’s day and age, kerosene is most commonly used for heating and jet fuel. Particularly, high-grade kerosene is the most important ingredient. In the US, we rarely use it as a source of heating. However, some low- and middle-income countries still use it for cooking and electricity.
What Makes Kerosene Different from Other Forms of Heating?
Heating Oil and Kerosene do have their similarities. They’re both used for heat, and they derive from crude oil. However, there are some very important differences between these two types of oil that you must be aware of. Firstly, you cannot switch between the two. This is because their respective systems are not fit to be able to burn the other fuel. Additionally, they’re stored differently and have different storage requirements.
Their different storage requirements stem from their different flashpoints. Heating Oil’s flashpoint is a little higher than kerosene’s, which makes it safer to use. The flash point of heating oil sits at 150 degrees Fahrenheit. This makes it much safer to use, especially outside. However, kerosene’s flashpoint is 100 degrees Fahrenheit. This means that kerosene is actually much more dangerous to use than heating oil!
However, kerosene stands out compared to other forms of heating with its lower freezing point. The lower freezing point makes it harder for the oil itself to freeze and gel. Heating oil has a higher freezing point at 16 degrees Fahrenheit. This makes Kerosene more suited for colder environments.
Can Heating Oil Tanks Use Kerosene?
When it comes to what you can and can’t do with kerosene, there’s a very thin line that you have to work with. While heating oil is similar enough to kerosene to be able to be mixed with it, you’re not going to be able to replace heating oil in your system with kerosene. If your heating oil tank is full, and you throw a little bit of it into the tank, then that’s fine. However, filling up an empty heating oil tank with kerosene will damage your system in the long-term.
While adding kerosene to your heating oil tank might sound odd, it’s used as a sort of cleanser. This will help clean out any sludge or anything in the lines that could be hindering usage. Adding it to your heating oil also helps as a way to prevent the oil from gelling, as its freezing point is much lower than that of heating oil! Mixing it in is a great way to help your oil maintain its liquid state in the cold weather.
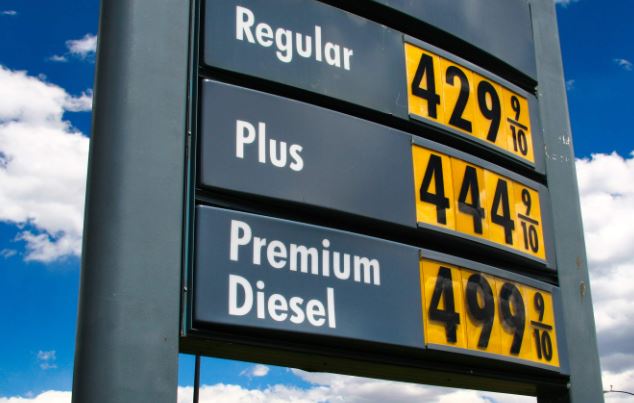
However, if you ever run out of oil, NEVER put Kerosene into your tank. If this does happen, I would strongly suggest going to your local gas station and grabbing around 5-10 gallons of diesel. This’ll hold you over until your next delivery arrives.
Switching from Heating Oil to Kerosene
Making the switch to kerosene from heating oil is difficult. If you want to make the switch, then you’ll need to have an entire system overhaul. This includes swapping out all the parts in your system from heating oil parts to kerosene-specific parts. This not only costs money, but also significant time. If you live in a cold environment such as Alaska, then this is strongly recommended! The cold temperatures up there are ideal for storing kerosene. This is often due to its low freeze point and slightly lower flash point than heating oil!
Most importantly, it’s not as readily available as heating oil, especially in the Northeast. Making the switch to kerosene from heating oil is very uncommon. If you plan on making the switch, then it’s important to know if you have a supplier in your area to warrant making the switch. But if you have it near you, it’s better as an additive.
Conclusion
Kerosene was very popular in the early 1900s. However, it’s been outshined by heating oil and electric heat as the years have gone on. While it has a lower freeze point, it’s more dangerous to use due to its lower flash point compared to heating oil. Its scarcity also makes it harder to come by, which makes it difficult as a long-term heating solution.
However, it still finds its uses in colder environments such as Alaska, and it is used primarily as an ingredient in jet fuel. If you live in the Northeast or somewhere with hot summers, it’s best to avoid using it as a source of heat. But it’s completely safe to use as an additive! If you wish to make the switch, make sure that you have a local supplier that you’re able to order from!
Happy Heating
Hunter