The Smart Oil Gauge is a fantastic tool for keeping track of your heating oil level and usage! One of the most common types of installation for the Smart Oil Gauge is on a Roth tank. While installing it onto a tank that’s a standard steel tank is simple, Roth tank installations have a little bit more to them. These extra steps are crucial for the Smart Oil Gauge to function correctly.
Roth Tank Compatibility
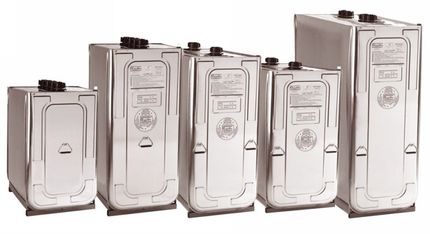
The most important thing to know about Roth Tanks is that the Smart Oil Gauge is compatible with all Roth tanks EXCEPT the Roth 1500L tanks. These tanks are 400-gallon tanks. However, the thing with these tanks is that they have an interior support baffle. This baffle goes across the center of the tank, and when the Smart Oil Gauge sends its signal down to take a reading of the oil in the tank, the gauge’s ultrasonic signal will bounce off this baffle. This results in the Smart Oil Gauge not being able to read beyond a half tank. The baffle itself is used to prevent the tank from collapsing in on itself when it’s full.
Now, importantly, on Roth 1000LH tanks, I recommend installing it to one of the centermost fittings. This is because, in rare instances, on Roth 1000LH tanks, there are handle indents on the internal tank. These indents are rare. However, installing the Smart Oil Gauge in the centermost fitting will help the sensor avoid catching the handle indents. If the sensor catches these indents, the gauge might not be able to read beyond 2/3 of the tank.
Roth Adapter
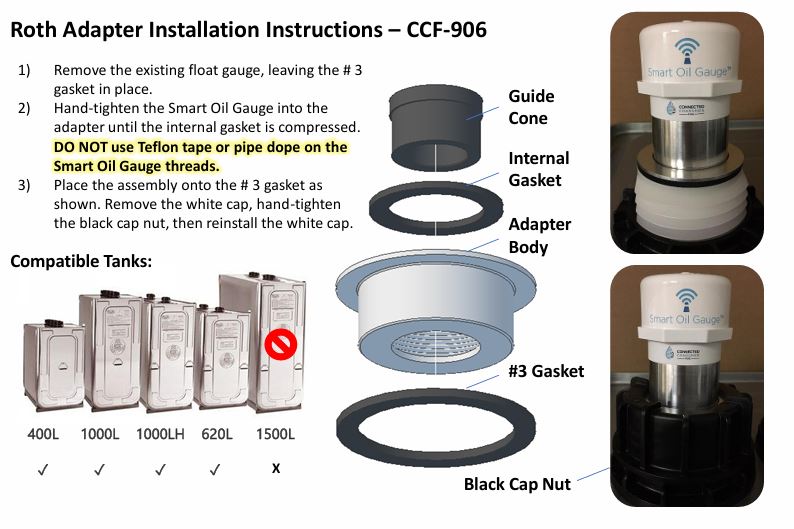
Unlike installations on a standard steel tank, the Smart Oil Gauge requires an adapter for installation. While Roth tanks do have standard 2″ fittings, they tend to be raised about an inch or so. The rubber fitting that comes with the tank itself can’t accommodate the signal that the gauge sends. This will cause the signal to bounce off the sides of the fitting and cause the gauge to read full. You’ll need to get this adapter for the install process.
But most importantly, you must get the correct adapter for your smart oil gauge. We have two different Roth adapters. One is for the standard Smart Oil Gauge, and the other is for the Smart Oil Gauge Duo. If you have the standard model, you’ll want to get the CCF-906. But if you have the Duo, you’ll want to make sure you get the CCF-906DUO.
Installing the Roth Adapter onto the Smart Oil Gauge
The Standard and Duo Smart Oil Gauges also have different ways of being installed into their required adapters. The Standard Smart Oil Gauge simply screws into the threads of the adapter, and the eye should line up with the guide cone to send the proper signal.
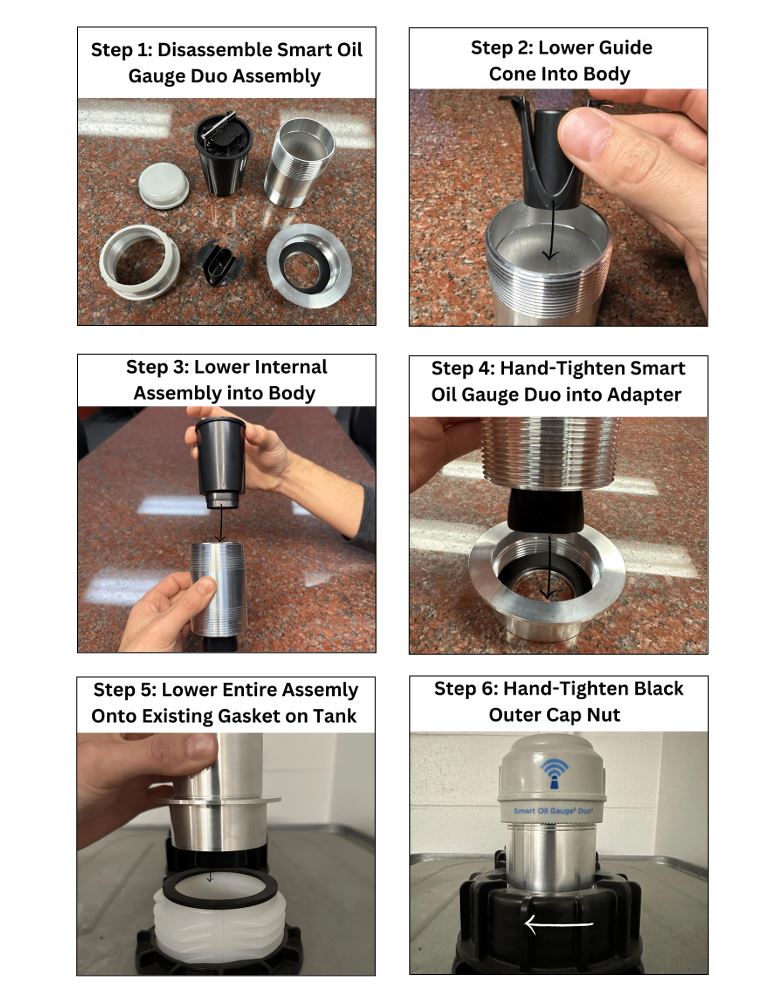
However, if you look at the Duo instructions below, you’ll see that the instructions are slightly different. Pay close attention to steps 2 & 3. This is because the duo requires the insert/guide cone to be slid into the body of the device. This makes it easier for the Smart Oil Gauge to properly send the signal beyond the raised fitting of the Roth tank. DO NOT install the adapter onto the Duo without sliding the guide cone through the metal body of the device.
Installing the Gauge onto the Tank
Now that you understand what size tanks the gauge can be installed onto, you’ll need to be able to install it onto the tank. Firstly, you’ll have to remove the float gauge on the Roth tank. This is because the fittings on Roth tanks are organized in such a way that there won’t be an extra fitting to install the Smart Oil Gauge.
After you’ve removed your float gauge, you’re going to want to remove the rubber fitting of the Roth tank. This is because this rubber fitting doesn’t accommodate the signal our gauge sends. This will result in the gauge reading full all the time if left on. But once you’ve taken that fitting off, you can go ahead and install the gauge onto that fitting! No pipe dope necessary! You can watch a video of the install here.
Enjoy Your Newly Installed Smart Oil Gauge!
Now that the gauge is installed, it’ll take readings of how much oil is in the tank and be able to report back level readings and usage data! The gauge is set up for a 4-hour upload interval by default, so you’ll get a new set of readings every four hours from the time of installation! Otherwise, if you want an immediate reading, you can press the button on the top right of the gauge, and that’ll force the device to take a reading and upload it!
Enjoy your Smart Oil Gauge!
Hunter

