How it Works: Heating Oil

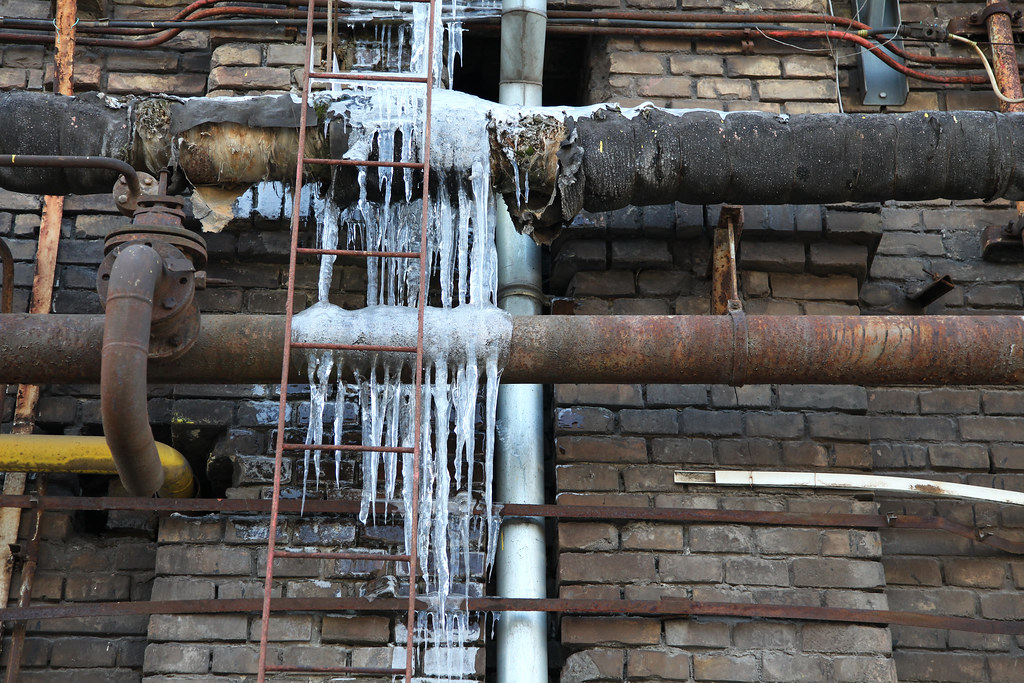
In the Northeast United States, we see a large fluctuation in weather and temperatures. Each day during the fall and even the winter can have variations in temperatures. In winter, these fluctuations could be anywhere from below zero to the low 30s! This calls in our old friend, heating oil! How exactly does it work, and what is there to know? Well, sit back and read on, because I’m going to go through everything that you need to know about how it works!

Heating Oil: Step by Step

For heating oil to be able to heat your home, your system has to go through a process known as heat conversion. Now, this isn’t the only fuel that goes through this process. All forms of heating need to go through a conversion process of some kind before your home begins to warm up.

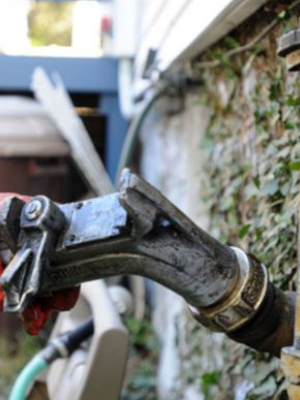
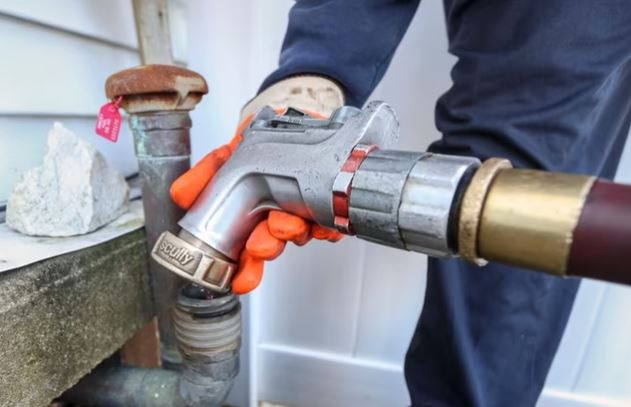
The first thing that needs to happen is heating oil needs to be delivered to your home. This is done by ordering online or through your local dealer and scheduling a time to deliver. The second step is for heating oil to go through the conversion process. Most of the time, it will go through your tank’s feed lines and go to the burner. Once in the burner, the heating oil undergoes the heating process. For heating oil, this is through atomization. This is the process of turning the liquid state of oil into a gas so that your burner can ignite it into fuel. The final step is your heating oil system distributing heat throughout your home. This can only be done after the oil has been converted into a gas.

This is a simplified version of how the heating process works.

The Popular Forms of Heating

While Heating Oil is the most popular way to heat your home in the northeast. There are several other popular ways to heat your home.

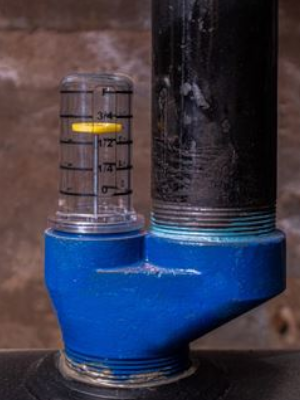
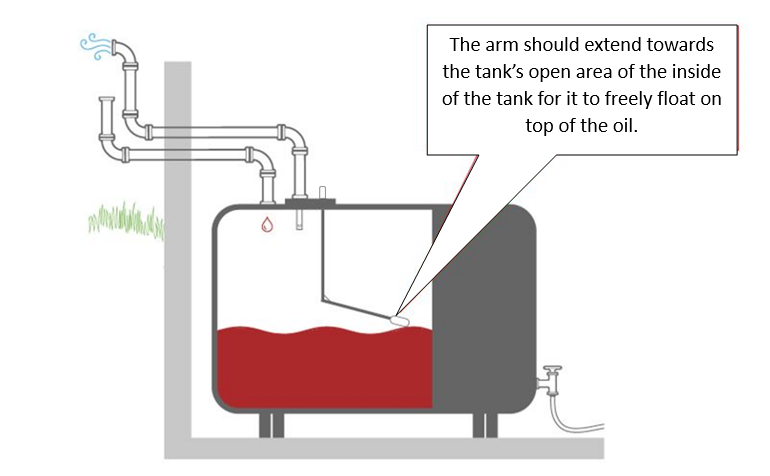
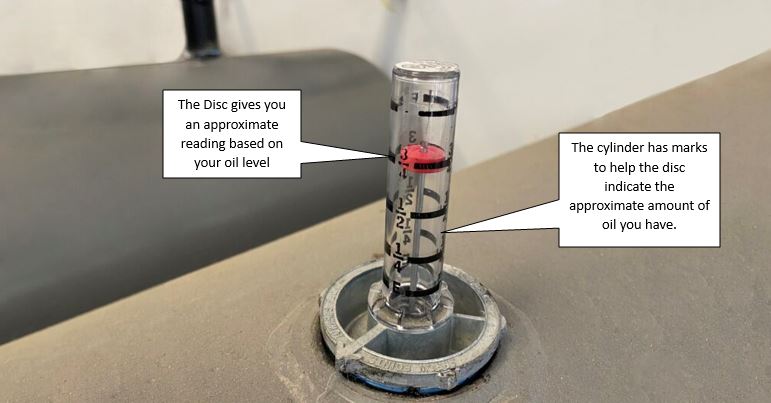
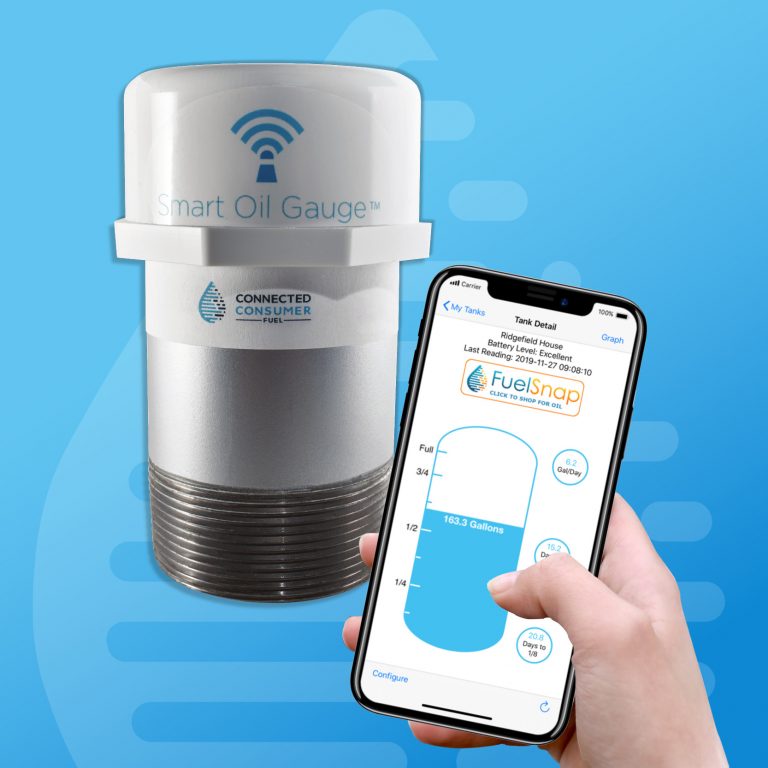
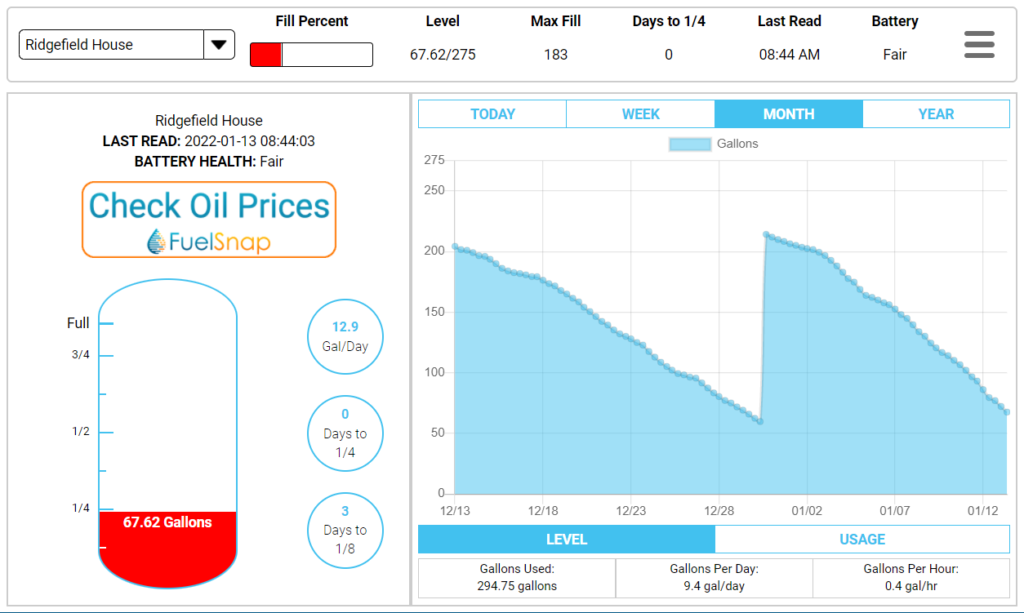
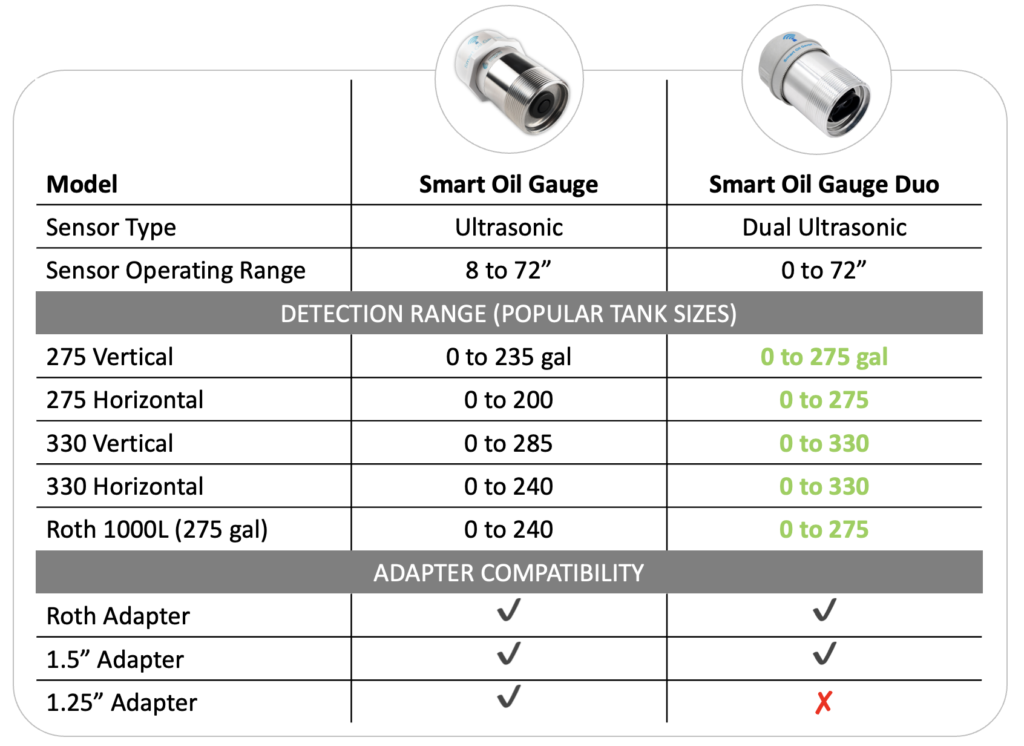
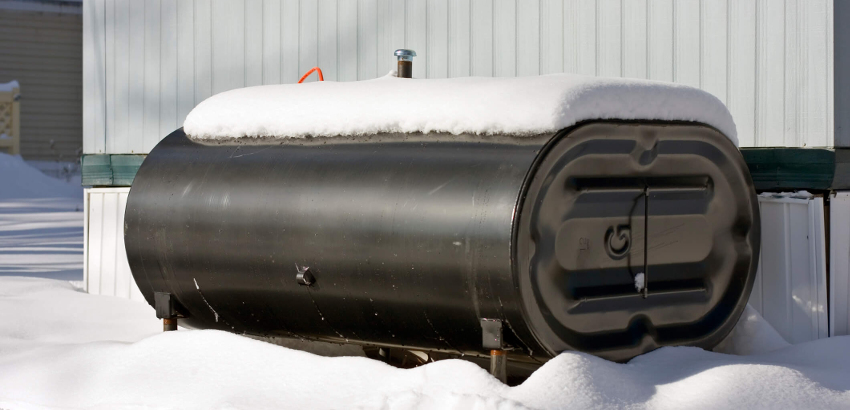
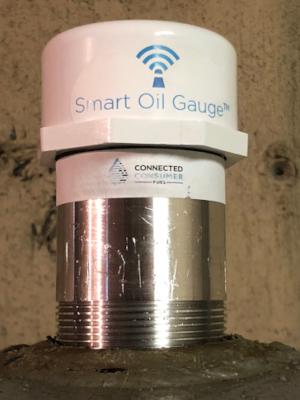
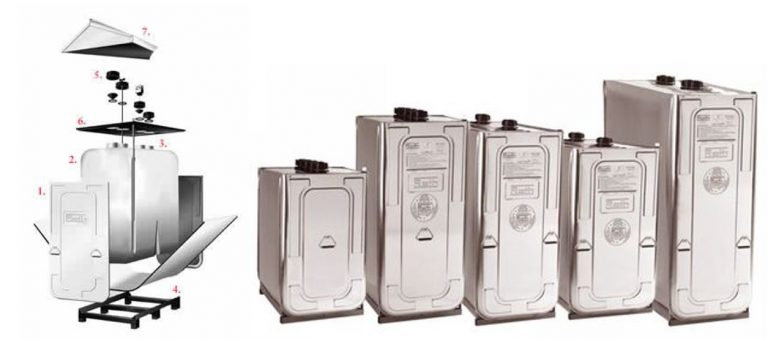
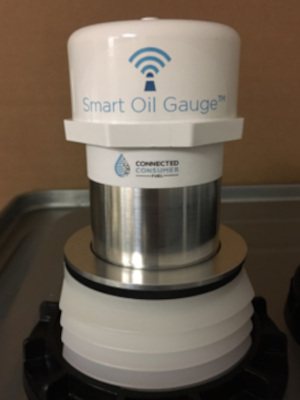
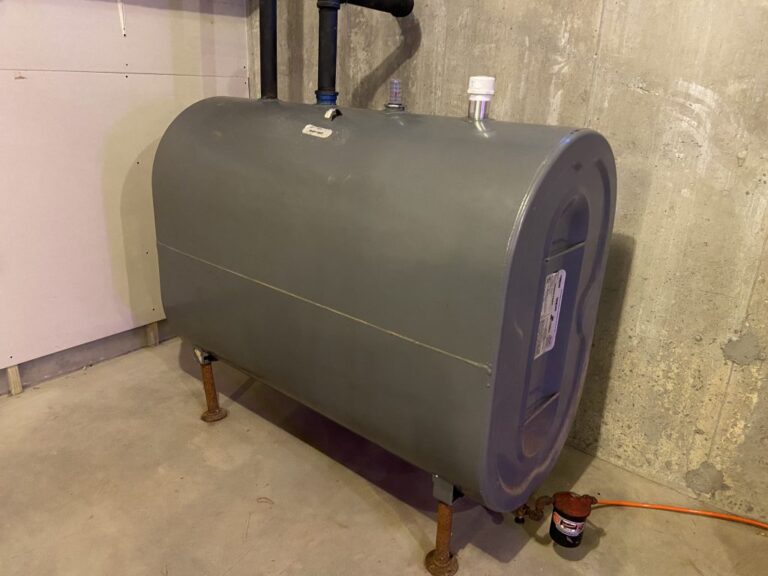
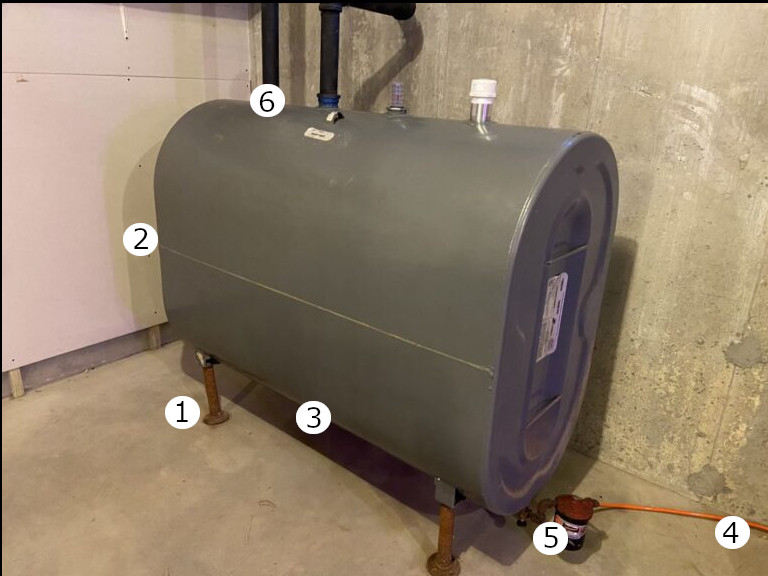
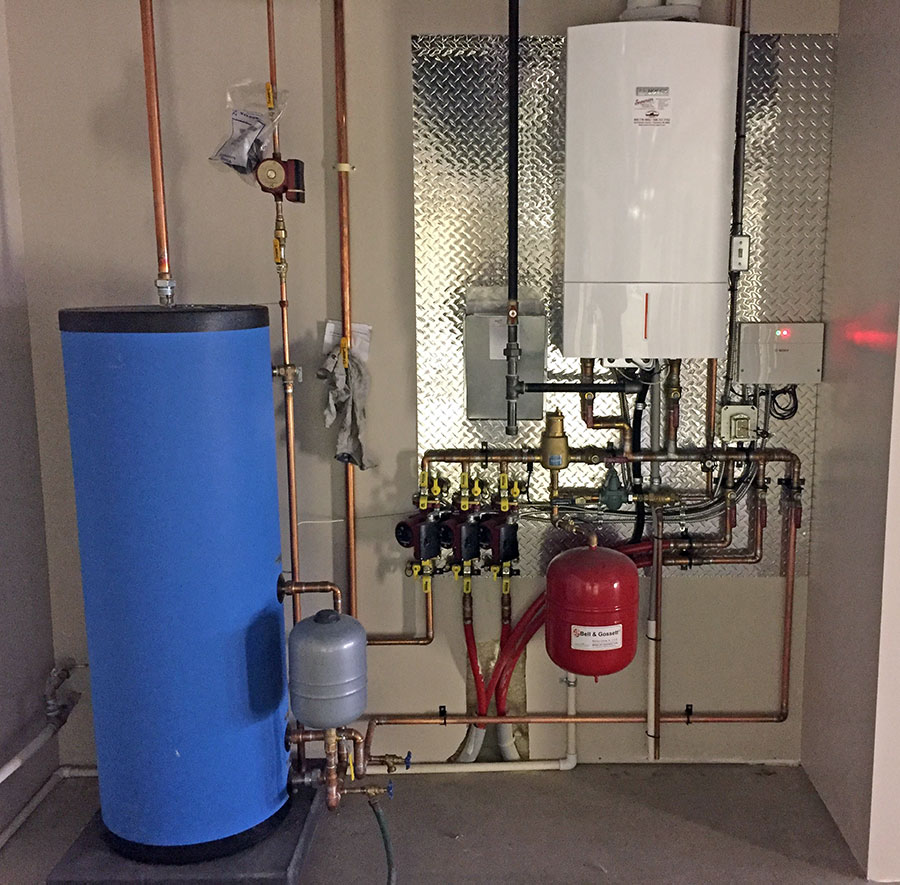
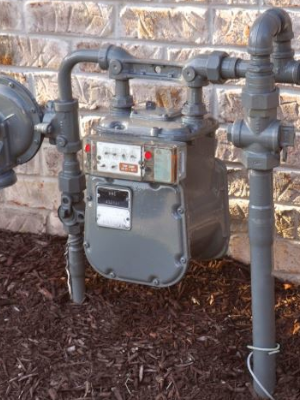
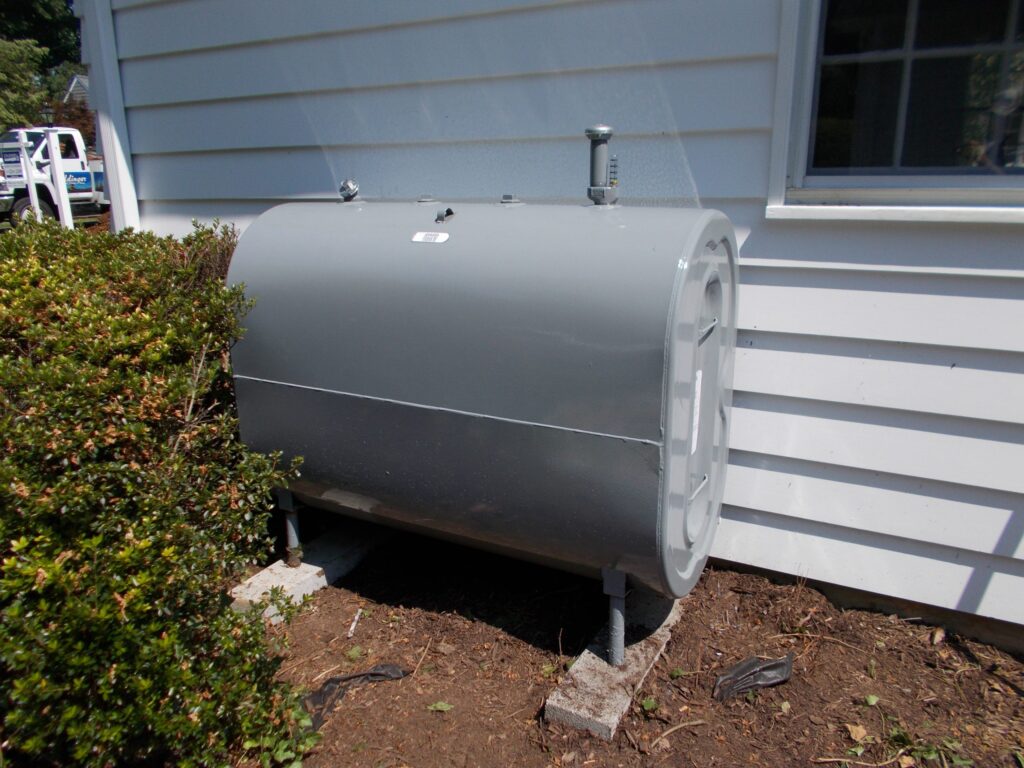
Heating Oil: This is the most popular way to heat your home in the northeast US. Heating Oil’s a form of deliverable fuels and will require your dealer to come out and deliver. To store heating oil, you’ll need to have a fuel tank. This oil tank can be found on your property, either indoors or outdoors. You can typically find them in basements, crawl spaces, or garages. This tank stores heating oil that will make it’s way over to your burner, where it then converts to heat. The nice thing about heating oil is that it burns really hot! It burns much hotter than natural gas and propane, which means that it’s easier to heat your home.

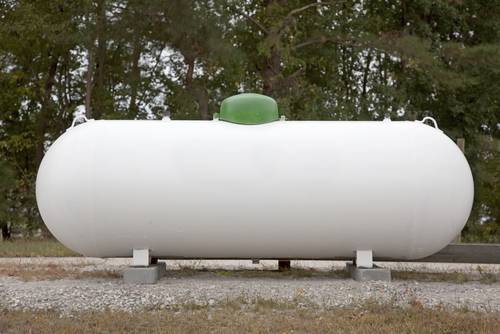
Propane: Similarly to heating oil, propane is a delivered fuel. This means that you will have to have a propane dealer come out and deliver it. You’ll also store your propane in a tank like heating oil. But unlike heating oil it’s restrictive. You can only get propane from a delivery by your provider. This makes it a little bit more expensive than both Heating Oil and Natural Gas. But, the nice thing about propane is that it’s very versatile! Other than for heat, you can use it for gas stoves, generators and even fireplaces!

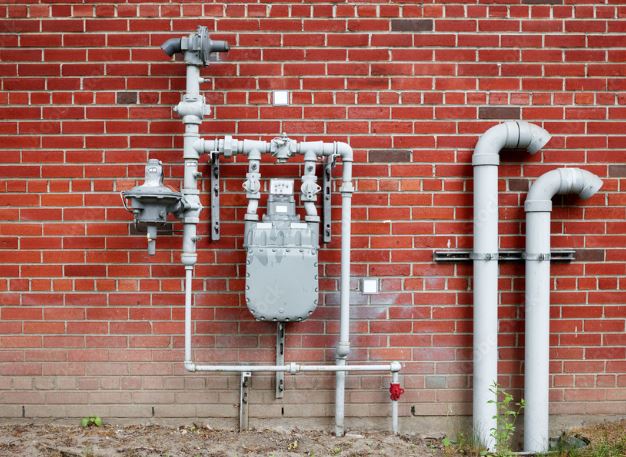
Natural Gas: This is one of the best options for home heating, but it’s is not easily available. It is only available in places where there are networks of pipes below the home. These pipes will connect to your home from the street or network of pipes in your home. But the nice thing about Natural Gas is that it’s a utility, so you don’t have to worry about deliveries! You’ll be able to simply adjust it as needed and pay the bill when it comes! But on the downside, you cannot choose a provider.

Electric Heat: Electric heat is becoming more and more common. However, it is expensive! Much more expensive than heating oil. But it is useful in places where there are mild winters or as a backup heat source. You’ll often never see it in large homes because of how expensive it is.

Converting Oil to Heat

This process involves the oil in your tank moving to your burner of choice. This process involves turning it into a gas from a liquid state. On heating oil and propane tanks, the burner will need to ignite these gasses that get released from the gas lines. The gas is then moved into the burner where is ignites and turns into heat. Then after this, heat is evenly distributed throughout your home.

But it’s important to know that in it’s liquid state and at room temperature, heating oil is NOT FLAMMABLE. For it to become flammable and be able to ignite, it needs to be heated to 140 degrees Fahrenheit. It then goes through a process known as atomization, which is the main process that converts heating oil into gas. After the oil goes through this process, it will move into the burner where it is then turned into heat and distributes around your home.

You might see these types of radiators around your home. These tend to link to a boiler or your electrical system.

Transferring Heat Through Your Home:

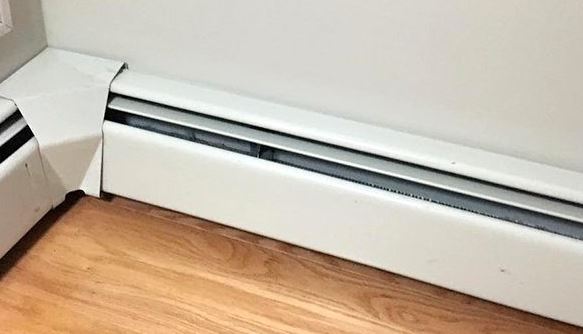
In today’s modern homes, the most common way to distribute heat throughout your home is by using a boiler. This heats up water and distributes it throughout your home. It then releases from the radiators and spreads out through your home.

Radiators are very common in homes in the northeast. There are both electrical radiators and non-electrical radiators. Non-electrical radiators tend to work with boilers and furnaces after your heating oil system has converted it into heat. All you have to do is adjust the thermostat and your system will change how much oil you’re burning or how hot you’re making the home. These systems aren’t very complex, but if you’re using electric, be careful as these can be expensive.

Forced hot air will often come out of these ducts. These ducts push the hot air into your home to keep it warm.

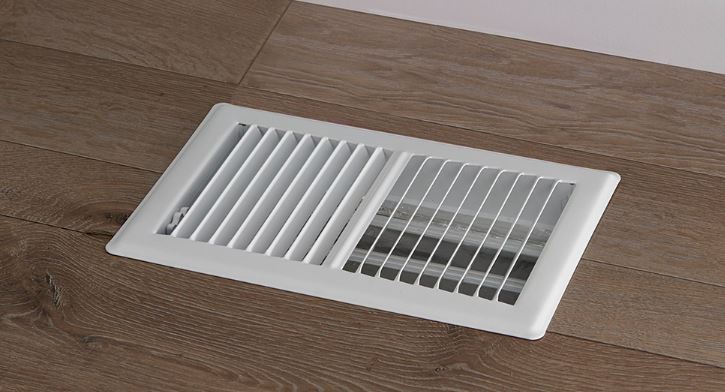
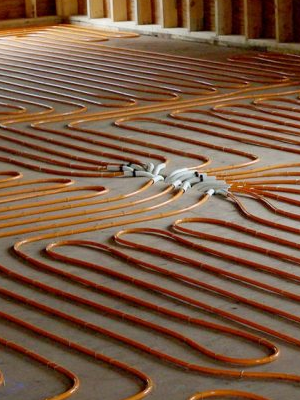
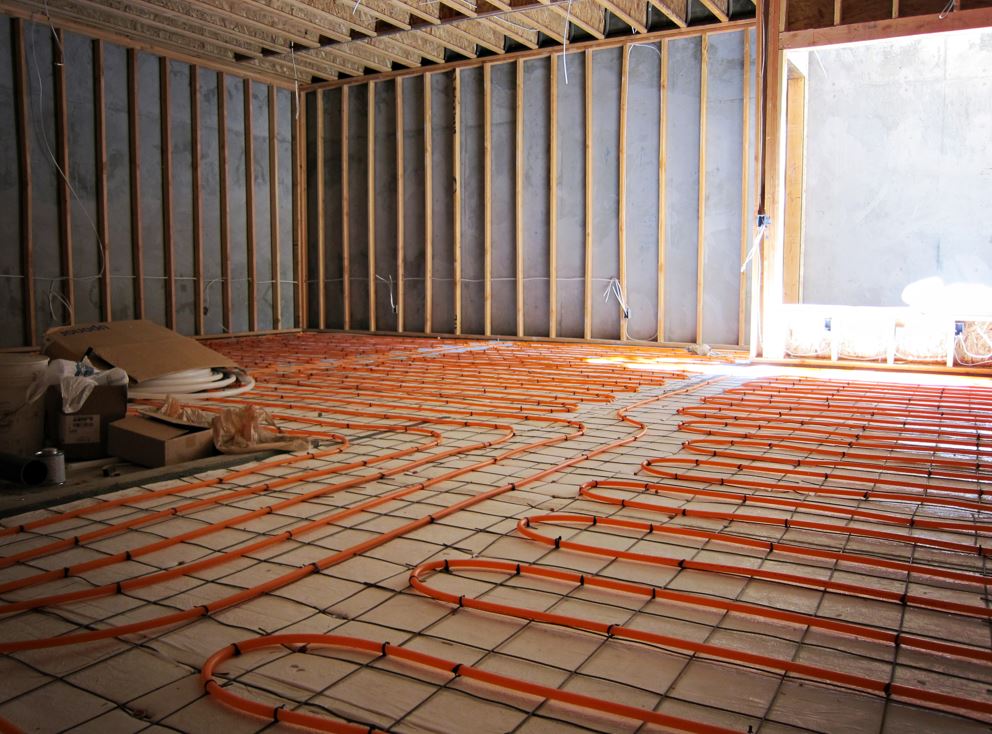
Forced Hot Air is becoming increasingly common nowadays. This is the process of your boiler heating air in the basement before the blower sends hot air throughout your home. There are ducts in the floor that connect to your boiler that pushes the hot air through. The hot air then distributes throughout your home. The nice thing about forced hot air is that during the summer, you can use it as an AC unit. This means that you can get both cooling and heating with Forced Hot Air!

Conclusion

Heating Oil is the most popular way to heat your home in the Northeast for a reason. The process on how it works is quite simple. Once you understand the basics of heating oil, you’ll become a pro! But, unlike Natural Gas or Forced Hot air, you might have a couple restrictions that can affect you when you order. This is typically dealer availability and pricings. But you do have a lot of freedom of when you can order unlike propane, which is much more restrictive.

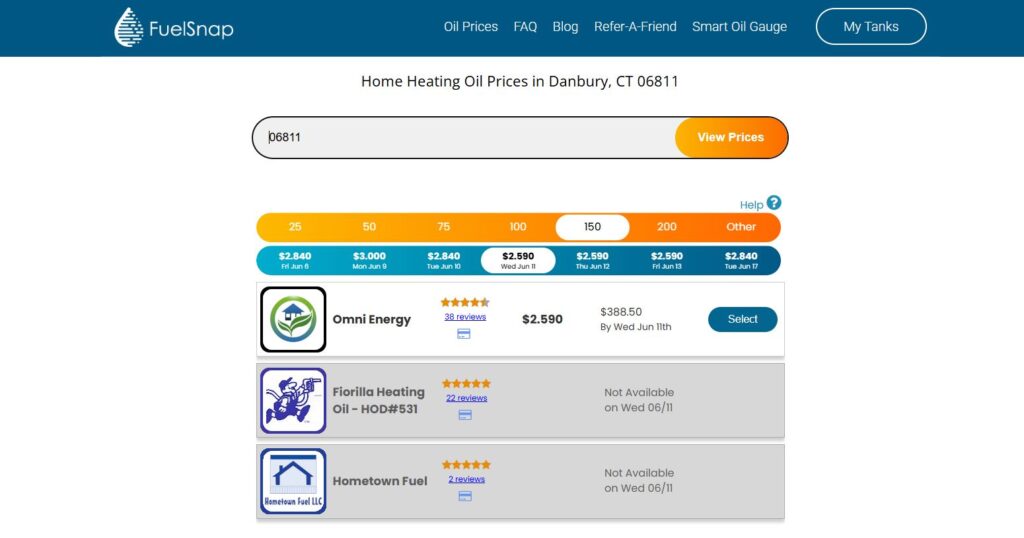
While it’s expensive, automatic delivery is a very useful tool. Your dealer will come out and deliver to you over an agreed period of time that will help ensure that you don’t run out! This means that you don’t have to worry about when your next delivery will be! However, using a website like FuelSnap will ensure that you can get the lowest prices available to you!

Knowing your heating system is important for a variety of reasons. These can include when you need to order, how fast you burn oil and much more! Even if you’re not using heating oil, it’s good to familiarize yourself with your system so that you can plan accordingly!

Happy Heating,

Hunter

The Accuracy of your Tank Gauge

All Heating Oil Tanks have a tank gauge. This gauge will tell you how much oil is in your tank. Whether or not your gauge is a standard float gauge or a Smart Oil Gauge will also play into the gauge’s accuracy. Why is this? Well, a lot of float gauges can get bogged down and coated in oil, which can affect their overall accuracy. Now you might be wondering which tank gauges are the most accurate? Well, don’t worry because I’ll be going over all that here!

What is a Float Gauge and How Does it Work?

The float gauge is a very simple tank gauge to understand. Basically, it’s a metal arm with a bobber at the end and the bobber will tell you how much oil is in the tank. The metal float arm connects to a cylinder with a colorful disc at the end. The colorful disc will line up with the marks on the cylinder to show you how much oil is in the tank. For example these cylinders usually have empty, 1/4, 1/2, 3/4 and full tank marks. What displays depends on where the disc sits in the cylinder.

But as you use oil, you will slowly see your oil level go down. Meanwhile, when you get a fill-up, you will see the disc go up which will bring the reading on the cylinder to the full mark or even the 3/4 mark if you didn’t get a complete fill.

This is what the inside of a heating oil tank looks like. Like shown in the graph, the float arm moves up and down as it sits on top of the surface of the oil.

Reading Your Float Gauge

Reading the float gauge on your tank is relatively easy. The float arm connects to a colorful disc inside a plastic cylinder. Where the disc sits at depends on how much oil is in the tank. The bobber will sit on the surface of the oil, which is where you’ll find out how much oil you have in the tank.

But it’s important to note that float gauges are only an approximate reading. Float Gauges aren’t always completley accurate, especially the older that they get. On older float gauges, they’ll actually be less accurate because overtime, oil and sludge will coat the bobber causing it to read less than what’s really in the tank.

This is what a typical float gauge will look like. As you can see it has lines for the various different fill points of the tank.

Float gauges also normally don’t read for specific tank sizes. This means that if your tank is a 275 gallon or a 330 gallon, the float will not know which size it’s reading for. So be sure to keep that in mind when you are using the float gauge and be mindful for what size tank you have.

If you know your tank size, then you’ll be able to better understand what the float gauge is reading. All float gauges will normally have marks on their cylinder for “Empty”, 1/4, 1/2. 3/4 and “Full”. How many gallons exactly this is, will have to be determined by a stick measurement and a tank graph chart. You can use our tank calculator by following this link.

An important rule to follow when using these tanks is Always Order at a Quarter Tank. This will ensure that you have enough heating oil in your tank by the time your next delivery arrives.

Float Gauge Accuracy

Unfortunately, float gauges are not very accurate in the long-term. There are a few reasons for this, but there are two major reasons for this:

Age of the Float Gauge

After several years of using the float gauge, it will have sludge begin to build up on the bobber. This will weigh down on the bobber and cause it to be inaccurate. The bobber also might get caught on the sludge build up on the bottom of the tank. That can cause the gauge to be inaccurate as it reaches the bottom of the tank.

This is an example of what a float gauge coated in sludge looks like. This is what the bobber will tend to look like after being removed from the tank.

The bobber of the float gauge can get stuck on the bottom of the tank. However, it can also get stuck on the sides of the tank too. Overtime, the float gauge might move slightly in the tank, and what happens sometimes is the bobber of the float getting caught on the side of the tank.

Float Gauges aren’t aware of Tank Geometry

The arms of the float gauges are only meant to move up and down. Now because of this, they do not take the curvature of the tank into consideration. While the middle of the tank is straight up and down, the sides of the tank are curved. This means that there is actually less surface area in the tank than the float gauge might think. Due to this, once you start hitting the curved portions of the tank, the float will look like that you’re using a lot more oil than you actually are. But in actuality, there’s less oil within the bottom of the tank than you might think.

The Smart Oil Gauge

The Smart Oil Gauge is currently one of the best ways to monitor your heating oil tank. These devices are installed on top of your tank and operate off of an ultrasonic sensor. The ultrasonic sensor will bounce off the oil and go back up to the sensor to report. The nice thing about these devices is that they are able to accommodate for the curvature of the tank, unlike the float. This also means that if your tank is a specific size, you can program the Smart Oil Gauge to read for that tank size all by using a custom tank ID.

This is the standard Smart Oil Gauge model. It is a single sensor device that will pick up your tank’s level and send it back to the app where you can view it.

Tracking Your Usage with the Smart Oil Gauge

The Smart Oil Gauge is very useful and incredibly helpful. You’re able to track not only what your oil level is, but also your usage. Tracking your usage is very important for you to know when you need a delivery of heating oil and when you’ll need to order. The gauge will keep track of daily, weekly, monthly and yearly usage and level data. Here is just a small list of what exactly the gauge tracks:

  • Oil Usage (Daily, Weekly, Monthly and Yearly)
  • Days until 1/4 Tank
  • Days until 1/8 Tank
  • Receiving a Fill-Up
  • Abnormally High Usage
  • Total Gallons Used

The Accuracy of the Smart Oil Gauge

One of the most important things about the Smart Oil Gauge is it’s accuracy. The Gauge itself will read the level based on what size tank the gauge is setup for in the app. So upon setup of the gauge, it’s very important to understand what size tank you have. If your tank is a 275 gallon vertical tank, then the Smart Oil Gauge must be setup to read for that tank size or it will be inaccurate.

The most common tank sizes that the Smart Oil Gauge will be installed on are typically Granby 275 gallon, 330 Gallons and Roth 1000L tanks. Now it’s important that during setup of your Smart Oil Gauge that you select these as your tank sizes. Not doing this will cause the sensor to not be accurate when it is taking level readings.

The usage and level graph shown on the app will show you what your level is and your usage as you burn oil.

Finally, if you are using the gauge on a Roth tank, then you MUST get the Roth Adapter. These adapters are required for Roth installation because without them, the gauge is not going to read properly and the signal will hit the fitting causing it to read full. The Smart Oil Gauge sends it’s signal in a cone shape. So without the special guide cone, the gauge will not be able to properly send the signal into the tank.

Standard vs Duo Smart Oil Gauge

Unlike the float, we offer two kinds of Smart Oil Gauges. They are the standard model and the Duo model. These devices are each a little different, but function similarly.

The standard Smart Oil Gauge is a single-sensor device. This device can only operate from 8″-72″. This is due to a slight sensitivity that the device has when the tank is full. When the tank is full, there isn’t enough room to send the signal properly. This can cause the gauge to read less oil than what’s actually in the tank after a delivery. We have an in-depth explanation about this on our website. I am providing a link to that here. Additionally, unlike the Duo, you cannot remove the boards from the gauge, as this will cause the device to be unable to communicate with the sensor.

This is a side by side as to what each gauge offers. Both gauges have their differences that make them both useful!

However, the Smart Oil Gauge Duo is currently our most accurate sensor. It has a larger operating range of 0-72″, unlike the standard model. This means that even after a fill-up, the device will be reading accurately. Additionally, you can take the interiors of the gauge out to troubleshoot in case you need to swap out batteries or update your WIFI credentials! If you’re interested on the differences between the two, you can read our article on their differences here.

Which Gauge Is More Accurate?

When comparing the two gauges together the Smart Oil Gauge is definitely the more accurate device. This is mostly due to the float becoming less accurate over time as it gets bogged down and coated in sludge and oil. Float gauges also can get their bobbers stuck on the sides or bottom of the tank which can cause it to not read correctly.

But the Smart Oil Gauge is very accurate. As long as it’s setup for the correct tank size, you’ll be able to know exactly how much oil is in your tank at any given moment! While the standard model has a little bit of a sensitivity at the top of the tank, the Duo doesn’t which makes it much more accurate than even the standard model! Just make sure that you either replace your float with this gauge or have an extra fitting to install it in!

Happy Heating,

Hunter

Which Tank is Better: Granby or Roth

If you’re in the market for a new heating oil tank, or you’re thinking of buying one for your new home, you’re in the right place. Granby and Roth are the two most popular brands and tank styles when it comes to new tanks. They each have their own benefits and drawbacks, but which one is better?

Typically, you’ll need to replace your tank every 10-30 years. Most heating oil tanks will last quite a long time. However, if you properly maintain it then they will last so much longer than that!

In this article, I’ll be covering what you need to know to replace your tank. I’ll be covering both of the Granby and Roth tanks and what you need to know with either of these.

How a Fuel Tank Works

Before you make a decision on what kind of tank you should purchase, it’s very important to know how it works. When you receive a delivery, the dealer will access your fill pipe. Dealers will have to connect their delivery hose to the fill pipe outside. This is so that the dealer can pump oil into your tank.

Next to the fill pipe is a vent pipe, this is for airflow. This airflow also prevents pressure from building up, which can cause a lot of damage to your tank and system if there isn’t proper ventilation. However, the vent pipe also has a unique vent alarm. It’s similar to a whistle and will alert the driver when to stop pumping. When filling up, the whistle will emit a loud whistling sound.

This is a chart on how heating oil tanks work. The float arm measures the amount of oil in the tank while the fill and vent pipes help airflow.

Your tank also has a set of feedlines that connect it to the burner. The system will draw from the feed lines and transport oil from the tank to the burner. Then, once the oil has reached the burner, it goes through ionization and converts into gas. This then causes it to turn into heat. The feed lines are commonly on the top or bottom of the tank. However, feed lines on the top won’t normally reach the bottom. This is is similar to a straw that doesn’t reach the bottom of a cup. For top fed feed lines, there will still be a couple of gallons left in the tank when it’s “empty”. On a 275 gallon tank, this will tend to be around 30 gallons.

Granby Heating Oil Tanks

These tanks will typically have four fittings on the top of the tank. However, how many of these fittings are available will depend on your tank’s setup. Typically, two fittings are always occupied. Those are the fill and the vent pipes. These are requirements on all oil tanks. This is so that you can get fill-ups and air can properly flow throughout the tank. The other fittings are occupied by either the feed lines or the float gauge. However, sometimes the float gauge will be in combination with your vent and the feed lines will sometimes be located on the bottom of your tank. Depending on your setup, this means that you’ll have anywhere from 0-2 available fittings on your tank.

Heating oil tanks will often look like this and will be commonly installed indoors. However, tanks will occasionally be installed outdoors like the above example.

Granby tanks have a large variety of tank sizes to choose from. They have tank sizes anywhere from 138 gallons to 330 gallons. Most of the time, these tanks will either be in horizontal or vertical orientations. The orientations of these tanks are designed so that they can fit in compact places such as a crawl space or the corner of your garage.

Granby tanks are also able to have multiple tanks installed alongside each other. The nice thing about having multiple tanks is that they’re easy for the installer to set up. All that they have to do is add some additional components and pieces to your existing system and then you’ll have multiple tanks! This gives you the ability to order and store more oil! You can check heating oil prices by going to our FuelSnap website.

The Smart Oil Gauge on a Granby Tank

Granby tanks are of the most common tank sizes that we see the Smart Oil Gauge installed on. This due to a mixture of the tank being so common in homes as well as the convenience of majority of these tanks having a standard 2″ NPT fitting. This not only makes installation easy, but it makes setting the tank size easier as well. The Smart Oil Gauge defaults to a standard 275 gallon vertical tank when you initially set it up! So if your tank is that size, then you don’t have to worry about your gauge having the wrong tank size or reading incorrectly!

The Smart Oil Gauge should be installed on your Granby tank like this. Make sure that there are 4-6 threads showing.

Roth Double-Wall Tanks

Roth tanks are typically double wall tanks. Meaning that inside of the steel tank, there’s a plastic tank. These tanks are leak proof, so if the interior plastic tank fails, then the steel exterior tank will catch it and prevent the tank from leaking completley. The great thing about these tanks is that plastic doesn’t rot or corrode. This means that the likelihood of your tank leaking is very low.

These are all the different types and models of Roth tanks. There is an interior plastic tank that the oil is stored in. But if that tank fails, the exterior steel tank will catch the oil.

Now, comparing these tanks to Granby tanks, these tanks also tend to be much lighter. The lighter Roth tanks make it easier to move them into your garage and basement. Additionally, these tanks have most of their mass in height. So they don’t take up as much space as a Granby! However, not all installers have experience with Roth tanks. Due to this, they will try to persuade you into getting a Granby tank.

Similar to a Granby Tank, these tanks are equipped with 4 fittings on the top of the tank. However, they are usually all setup the same unlike the Granby tanks. These tanks will have a fitting used for the fill, vent, feed lines and the tank gauge. Now unlike Granby tanks, Roth can’t have the feed lines connected on the bottom of the tank. This is because installing the feed lines into the Roth tank’s bottom will destroy the two tanks, making them useless. The feed lines will always be set up on the top of the tank.

Smart Oil Gauge on Roth Tanks

If you have a Smart Oil Gauge and want to put it on a Roth tank, it’s a little different than Granby. The biggest difference is the type of adapter you’ll need. The Smart Oil Gauge requires a an adapter for Roth tank installations. This is because without the Roth adapter, the gauge is going to be reading only full. The adapter is required because it helps the gauge send the signal properly. Without the adapter, the signal will bounce off the tank’s fitting and cause the gauge to read only full because it’s going to think that the fitting is the surface of the oil.

This is how a Smart Oil Gauge is installed on a Roth tank. It’s very important for your Smart Oil Gauge to have the Roth Adapter when on this tanks so that it can be accurate.

In terms of compatibility, the Smart Oil Gauge is compatible will all Roth tanks EXCEPT the Roth 1500L (400 Gallon). This tank has an interior support baffle that prevents the gauge from reading beyond half. Unfortunately, there is no way around this as the baffle goes right through the middle of the tank. The gauge will not work on a Roth 1500L.

As mentioned above, the Roth adapter is a requirement for all Roth tank installations. However, because there are two models (the Smart Oil Gauge Duo and the Standard Model Smart Oil Gauge) you will need to purchase the correct adapter. You can purchase them both on our website. However, to ensure you purchase the right adapter for your model, I’m linking them below separately.

Smart Oil Gauge DUO Roth Adapter

Standard Smart Oil Gauge Roth Adapter

Which Tank Should You Choose?

To be able to better help you come to the decision on which tank you should buy, I’ve included a chart that compares both the Granby and Roth tanks. Roth tanks tend to be a little bit more money. However, you’re really paying for the security and durability. But, the nice thing about Roth tanks is that they come with a 30-year warranty included. But, there aren’t a lot of installers who know how to install these tanks.

To wrap up, going with what you personally prefer will tend to greatly impact your decision. Now, I should specify that both tanks are FANTASTIC options. If you’re in the need of a new tank, then sticking with what you have will usually be the easiest thing to do. This will tend to make the cost of labor cheaper as well as making the job for the HVAC technician much easier!

If you want a tank that’s taller and takes up less space, then getting the Roth is the way to go. Their warranty might even sway your decision making! But with the Granby, you’ll get access to the class heating oil tank that’s been used for years! But if you want a reliable gauge that will tell you how much oil is in your tank and what your usage is at the touch of your fingers, then getting a Smart Oil Gauge is what you’ll want! You’ll be able to order oil when you need it and will be able to monitor your level and usage!

Happy Heating,

Hunter

When to Order Heating Oil

The question of when you should order oil is pretty troubling. When you are placing an order for oil, there are two questions that you should ask yourself. Those being “How much do I order?” and “Who do I order from?”. However, there’s another question that is often asked. That being “When should I order?”. Now this is probably the most important question that you should ask yourself when you’re thinking about ordering. If you order too late, then you might run out. But if you order too early, your tank might not be able to fit your whole order. But what happens when you order at a certain price per gallon, but then it goes up or down? Well, don’t worry, because I’m going to answer all these questions for you!

Heating Oil: What to Know

How heating oil works is very easy to understand. The bare bones of it is that heating oil is stored in a tank in your home. It is commonly stored inside or outside. This tank is connected to your burner/furnace by feed lines. These feed lines are typically located on either the top or bottom of your tank. Your system will draw oil from the tank and bring it to the furnace where it is then ionized and converted into a gaseous state, where it then is then turned into heat!

Heating Oil is stored in a tank like the one above. They can be in all different shapes and sizes.

Heating Oil is also known as a delivered fuel. This means that you’ll need to have it delivered to your home periodically. This is to ensure that your home continues to be heated as well as to prevent any damage to your system. You’ll often need to contact a Heating Oil company to come out and deliver to your home. Unlike propane, you have the freedom to order from who you want and when you want.

When to Order

When you should order really depends on your current heating oil situation. If you just got a fill-up a couple of weeks ago, then you don’t need to order oil. But if you haven’t ordered oil in a while and you’re almost out, then ORDER ASAP. Typically, we recommend ordering oil when your tank is at a quarter tank. This will give you enough time to contact your dealer and schedule a day and time to come out and deliver.

But what about during the summer or winter months? In the winter months, when heating oil is in demand, it’s important that you order whenever you get the opportunity. During this time of year, dealers are often at their busiest. This makes it harder to get oil. Especially last minute if you’re getting very low! Luckily, putting diesel in your tank to hold you over until your delivery arrives. But you shouldn’t rely on it. But ordering oil when you’re at a quarter tank is crucial during this time of year.

This is what happens when you get a tank filled up. The driver will go out to your fill pipe and fill your tank from there.

Now during the summer, things get a bit more lenient. This is when demand for heating oil is at a yearly low. This means that prices tend to be lower and dealers have more availability. Plus, you’re not really going to burning a lot of oil during this time of year because you’re not going to be turning on the heat. A lot of heating oil users will buy oil during this time of year because it’s at it’s cheapest! Then, they won’t burn any oil until September because of the warm weather!

Avoiding Runout

Now, running out of oil is not fun. It is frustrating, and waking up to a cold home in the middle of winter is not a fun experience. If this has happened to you recently, the very first thing you should do is order heating oil. This will put you on the schedule with your dealer and will ensure that you have a delivery of heating oil that’s on the way! Next, run to your nearest gas station and buy 5-10 gallons of diesel. Luckily diesel is similar enough to heating oil which allows you to use it in emergencies to hold you over until your next delivery.

Whether you’re using a Smart Oil Gauge or a Float Gauge, you’ll want to order oil when your tank reaches the quarter mark. On Smart Oil Gauges, you’ll be notified when your tank is low. The gauge will send you an alert on your phone via push notifications. If you have email and text alerts enabled, you’ll get those too! But, the float gauge doesn’t have that luxury. Instead, you’ll have to go down to the tank gauge and look at it. If the float’s disc is at the 1/4 mark, then it’s time to order oil!

Putting a couple of gallons of diesel in your tank will help you out in an emergency. This is because you’ll prevent your tank from running out!

Waiting until the last minute to order heating oil is never a good idea. This is because, similarly to what I mentioned earlier, it can sometimes take a little while to get your delivery. Placing an order when your tank is at the 1/4 mark puts you in a safe range for when your delivery will arrive. On the average 275 gallon tank, this can be roughly 70 gallons in your tank. During the winter, you could see yourself burning anywhere from 3-5 gallons per day. This gives you plenty of time before needing to place an order.

Getting the best Price Per Gallon

Fluctuating prices for heating oil can make it hard to find the right time to order. Usually during the summer they tend to be at their lowest, while in the winter prices are at their highest. Naturally you’ll want to order oil when it’s at it’s lowest price. However, how do you find out what are the prices for heating oil. Well you can do this by shopping around at local dealers in your area. Calling them will help you get an understanding as to how much they are charging per gallon. Now, dealers can charge whatever they’d like per gallon.

Using a website like FuelSnap will help you shop around and get the best prices available to you!

Now, how does this affect an order you’ve already placed? Well the good news is that once you’ve placed an order for heating oil, you’re typically locked into that price per gallon. This can be a double-edged sword though because this means that if the price goes up or down, you’re still paying the price on your order. So if you place an order for $2.50 per gallon for example, and the price goes down to $2.45 per gallon, you’ll still be paying the $2.50 per gallon price.

But, when your tank is at 1/4 and you order oil online you’ve actually given yourself a bit of an advantage. Most dealers will have a minimum delivery of 100 gallons, but on a 275 gallon tank, you’ll actually be able to get 150 gallons when you order at a quarter tank. With a majority of dealers as well, the more you order, the better price you’ll get per gallon!

Monitoring your Usage

It’s very important that you have a working oil gauge! Whether that be the Smart Oil Gauge or the Float Gauge! This is because you have to have a working gauge so that you can stay on top of when you need to order and to know what your tank’s level is at! Using a Smart Oil Gauge will give you a big leg up on the float gauge, because you can be anywhere and be able to check your tank level! Thanks to the Smart Oil Gauge’s ultrasonic sensor, your gauge will be able to tell you how many gallons of heating oil you have! But, just make sure that your gauge is set up for the right tank size.

Using a Smart Oil Gauge will help you monitor your heating oil usage and level just at the tip of your fingers!

Float gauges are still useful too! They just require you to be a little bit more on top of your tank. You’ll still have to go down periodically to check what the float gauge is reading. This will help you understand how many gallon you have left and when you’ll need to order! But, just be aware that float gauges can get stuck on the side of the tank as well as become coated in sludge and oil which can prevent the gauge from reading accurately.

Order at a Quarter

Ordering Heating Oil when your tank is at a quarter tank is easily the best time for you to order heating oil. This is because this will give you the biggest safety net while you wait for your next delivery! But, if you forget check your oil and you’re low, order ASAP! You’ll want to make sure that your heating oil tank has oil in it so that your system doesn’t get damaged. If you want to order oil during the summer when prices are low, then absolutely do that! That will get you all prepared for the winter season! Just be sure to be on top of your usage and oil level and you’ll be a pro at gauging when you need to refill.

Happy Heating,

Hunter

What is the Correct Adapter for your Smart Oil Gauge?

With our implementation of the Smart Oil Gauge Duo, there are now twice as many adapters to choose from. However, it’s important to know that the Smart Oil Gauge Duo and the standard Smart Oil Gauge, have different adapters due to their different sensor structures. But which adapter is best for you?

These are the types of Adapters that we have. There are different models for your different model of Smart Oil Gauges

It’s important to note that standard off-the-shelf adapters that you can buy from Home Depot or Lowe’s WILL NOT work on our Smart Oil Gauge devices. This is because those adapters do not accommodate for our device’s signal. So any off the shelf adapters will cause the gauge to read only full. Due to this, it’s important that you purchase an adapter through us. Don’t worry, I’ll be covering all of our available adapters and how to use them.

Smart Oil Gauge Dimensions

The body of the Smart Oil Gauge is really just a short pipe that is threaded on both ends. This makes it so that it can thread into your tank while allowing the cap to thread onto the top. The gauge’s threads are a standard 2″ NPT pipe. This equals to around 2.375 inches. So if you’re measuring your fitting and it comes to larger than 2″, then don’t worry! You are perfectly fine as long as the fitting of your tank isn’t larger than 2.375 inches. NPT standard for National Pipe Thread, and these fittings are actually tapered. Meaning that the further down they go the tighter they get. These allow for a tight seal between the gauge and the tank.

The actual threads of the gauge are larger than 2″ because that’s actually referring to the inner diameter of the piping itself. So while your fitting’s diameter will be a total of 2.375″, your gauge will have a 2″ NPT that will allow it to properly thread on your tank.

Now, with the cap screwed onto the sensor, the outer dimensions are 2.8″ x 2.8″ x 5.3″. If you want the interiors of the gauge to be easily accessible to swap out the batteries and to troubleshoot, then I recommend leaving at least 6.2″ of head room. This will make it easy for you to swap out the batteries or troubleshoot when needed.

Where Do You Install the Smart Oil Gauge?

The Smart Oil Gauge must be installed on the top of the tank. It should be installed directly onto the tank’s fitting and must be flush with the tank. This will ensure that the gauge is able to send out the signal properly and that nothing will interfere with the gauge’s ability to read. If you don’t have any extra fittings for the gauge to be installed, you will need to remove the float gauge from the tank and install the Smart Oil Gauge where it was.

This is how the gauge should be installed onto the tank. It must be installed onto the tank’s fitting itself. It CANNOT be installed on a raised fitting or T-Pipe.

If you have a combined vent pipe that includes the float, you CANNOT install the gauge where that float is. The fitting for it is not only too small, but if you somehow managed to install it, the gauge will only read full because the signal would be hitting the bottom of that fitting. We have various guides on how to install the Smart Oil Gauge on both Granby and Roth tanks. Following those guides will help you get your Smart Oil Gauge installed!

Additionally, DO NOT install the gauge on a raised fitting or raised pipe. The reason for this is due to how the sensor sends out the signal. The gauge sends out the signal in a cone shape. So on a raised fitting, the gauge’s signal will bounce off the sides of the pipe, which would cause the gauge to only read “Full”.

Different Adapters Between Standard and Duo

It’s important to know that the standard Smart Oil Gauge and the Smart Oil Gauge Duo have different sensor structures. This means that they require different adapters. There are two types of adapters for the Duo model, while the standard has three.

If you go onto either amazon or our website, you will see that we have a few adapters. For the Smart Oil Gauge duo, you can get the Duo Roth Adapter if you have a Roth tank. If you have a Granby tank, you can use the 1.5″ Duo adapter if you don’t have a standard 2″ NPT fitting. However, there is no 1.25″ adapter for the Smart Oil Gauge Duo. This is because the Duo’s sensor is too large to fit into the small hole of that fitting size.

Now the standard model has three adapters. Similar to the Duo, there are adapters for 1.5″ NPT fittings and Roth tanks. There is also the 1.25″ NPT fitting adapter for the Standard Smart Oil Gauge. If you have a fitting of that size, you must use the standard model, and you cannot use the Duo.

Tank Compatibility

While the Smart Oil Gauge is compatible with a large majority of Roth tanks. There is one model of Roth tanks that the gauge cannot work on. Those are the Roth 1500L (400 Gallon Tanks). The reasoning for this is because of an interior support baffle on the inside of the tank. This baffle prevents the tank from caving in on itself due to the amount of oil in the tank. The Smart Oil Gauge will not be able to read beyond half a tank on these tanks in particular because of that support baffle.

These are various Roth tank sizes. The gauge is compatible with all Roth tanks except Roth 1500Ls.

Additionally, tanks that have fittings that are larger than 2″ NPT cannot have the gauge installed. The reason for this is because there are no adapters for those sizes in particular. You could use an off the shelf adapter, but as I mentioned earlier, those adapters do not accommodate for the gauge’s signal.

The Available Adapters

We have a variety of adapters for both the Standard Smart Oil Gauge and the Smart Oil Gauge Duo. There are versions for both the Duo and the Standard Model. However, as mentioned previously, there is no Duo Adapter for 1.25″ NPT fittings. But, if your tank is older or an uncommon size, you’re more likley to need an adapter.

1.5″ NPT Adapters

These adapters are the most common adapters. Next to the standard 2″NPT fitting, these are the second most common tank fittings. The outside exterior for these are roughly 1.9″.

You can purchase the adapter for standard devices here.

You can purchase the adapter for Duo devices here.

Roth Adapters

These adapters are required for Roth installation. If you have an eligible Roth tank, then you MUST use this adapter. Without this adapter, the gauge will not be able to properly send the signal, which will result in the gauge only reading full.

You can purchase the Roth Adapter for standard gauges here.

You can purchase the Roth Adapter for Duo gauges here.

1.25″ Adapter

These fittings sizes are pretty uncommon on a lot of newer tanks. Newer tanks will usually have a 2″ NPT fitting. But if you have an older tank, you’ll likely need this size adapter. There is no 1.25″ NPT Fitting adapter for Duo gauges.

You can purchase this adapter here.

Using this tank fitting graph, you’ll get an idea of if your fitting will need an adapter for the gauge.

Setting Up a Sensor Offset

After you’ve setup your gauge with your correct adapter, you will need to setup a “Sensor Offset”. This is because when you are using an adapter, it raises up the gauge by an inch. When this happens, you’ll want to make sure that your gauge is accurate. Without an offset enabled, your gauge will not be accurate. You can enable the offset by following these steps: Settings >> Tank Style >> Advanced >> Sensor Offset. Luckily, the offset only needs to be set to 1.0 for one inch. That is how high the adapter will raise your sensor. Setting the offset will tell the gauge to ignore the first inch of readings. That way the sensor accommodates for the raising of one inch.

Once in the “My Tanks” setting on the app, follow the steps above to change your offset.

Conclusion

Now based on which gauge you have will determine the adapter that you need to purchase. It can be a little confusing with all the different adapters, but if you follow this guide, you’ll be able to get the right adapter for your Smart Oil Gauge! But, don’t think that you absolutely need an adapter! If your tank is a non-Roth tank and has a 2″ fitting, then you don’t have to worry about getting an adapter! But if you need help installing the adapter or you’re not sure where to go from here, please let us know!

You can contact our support whenever you need help! We are available Monday through Friday from 8am-5pm EST at 203-456-1499 option 3!

Happy Heating,

Hunter

How To Prevent Frozen Pipes

With winter around the corner, it’s important to prepare yourself for cold weather. These past couple of winters have been very cold! Although last year, we found ourselves having a semi-warm winter. But that doesn’t mean that you can be so easy going when it comes to warming your home. This also includes preventing Frozen Pipes. Now, while they aren’t very common, they do happen and can be detrimental. They can happen to anyone if the proper steps aren’t taken! While they can happen to anyone, they tend to happen in older homes more frequently.

Additionally, in homes that are mass produced where corners are often cut, it can happen more frequently as well. It could start off as something really simple, such as loose insulation and eventually lead into frozen pipes. So how exactly can you do this? Well don’t worry, I’ll be going over everything that you need to know here!

Are Frozen Pipes Dangerous?

When you first hear the term “Frozen Pipes”, you might not think much of them. You might think that they’re not as problematic at first. Which sometimes, that’s the case. Usually as long as you have water flowing through the pipes, then you’ll be fine. However, if you don’t have any water flowing through your pipes, then that’s where the problem starts. This can build up pressure in your pipes and when there’s nowhere for that pressure to go, this can cause your pipes to burst. Pipes bursting can lead to hundreds or thousands of dollars in damages.

This is an example of what frozen pipe damage can look like. This is more industrial piping, but it overall has the same cause and effect.

A blockage in your pipe is the most common cause of a frozen pipe bursting. This blockage creates intense pressure that has nowhere to go. This pressure will build up and expand in the pipe. This blockage is most of the time due to ice in your pipes. The pressure builds up until it has nowhere to go until BOOM, the pipe bursts.

Preventing Frozen Pipes

When preventing frozen pipes, it’s important that you avoid them at all costs! But you might be asking, how do you avoid them from happening? Well below, I’ve gathered a list of things to do to prevent this from happening!

  1. Let Your Water Drip on Cold Nights: When water is running, it has a harder time freezing. During nights that are very cold, it’s good to try to slightly turn on the faucets to let water flow through your home. Even if it’s a little bit of water, it can help prevent your pipes from freezing and bursting.
  2. Insulate Your Problem Pipes: In homes that are older, you’ll notice that some pipes are more prone to freezing than others. You can easily get around this by putting a little bit of foam insulation around those pipes. This will prevent these pipes from freezing and could end up saving you thousands of dollars. Not to mention that this solution is cheap and easy to implement!
  3. Leaving Your Cabinets Open: The Pipes throughout your house can freeze inside the cabinets of your bathroom and kitchen. This can happen even if the rooms in the house are warm. The closed doors of the cabinets prevents heat from getting inside the the cabinet and cools the pipe. This can result in your pipes freezing. On very cold nights, you should leave your cabinet doors open to allow heat to flow through ultimately warming the pipes.
  4. Increase the Heat: During really cold nights, some people will actually lower the heat to save money. DO NOT DO THIS! This can contribute to your pipes freezing! When it’s cold, you really should keep the heat hot. This will not only prevent your pipes from freezing, it also keeps you warm too!
  5. Space Heaters: Space Heaters are your best friend when it comes to heating your home. While they might not seem like, they help warm up your home much faster where it tends to get cold fast! In my house, we’ll have two space heaters upstairs and our fireplace going downstairs and the whole house is nice and toasty!
  6. Heating Tape and Heated Cable: Using cable or tape that’s heated is super helpful in preventing your pipes from freezing. This requires a little bit more upkeep because you’re going to have to remember to turn the tape on and off. You can use this if the above options don’t work out for you.
  7. Make Sure that You Have Enough Heating Oil: Running Out of Heating Oil means that you’ve got no heat. This can lead to your pipes freezing as it becomes extremely more likley that they will freeze. To prevent this from happening, I highly recommend ordering oil when you’re at a quarter of a tank. If you’ve run out of oil, then you’ll want to run to the gas station to get about 5-10 gallons of diesel. This should hold you over until your delivery arrives.
This is what piping insulation looks like. It wraps around the pipe ensuring that it’s warm and prevents pipes from freezing.

Stopping Your Pipes from Freezing

You should stop your pipes from freezing before they even get the chance to. Doing the above mentioned will prevent you from getting thousands of dollars in damages and save you a lot of headache. If the weather is forecasted to be cold, make sure you warm up your house beforehand. Make sure that the baseboards in your house are warm by touching them around your house. This normally means that water is flowing through your house and that your pipes are very unlikely to freeze.

By leaving your faucets dripping, cabinets open and insulating your pipes, you’ll have no issue with freezing pipes! But, if you notice that a pipe in your home is frozen or freezing, you should contact a plumber fast! It’s very important that you get it resolved as soon as you can and so that you can prevent damages to your home!

Happy Heating,

Hunter

How to Prepare for Heating Season

It’s September! Which means schools are back in session and heating season is just around the corner. The coldest months of the year are slowly approaching, which means that you should start preparing to heat your home! But this doesn’t just mean stocking up on heating oil. There are actually a lot of other things you can do to prepare yourself. I’ll be going over those here!

During the fall, temperatures tend to get cold. So it’s important to be ready for when the weather gets cold!

Changing Your Air Filters

If your primary source of heat is with forced air, then this is the best time for you to change your air filters. You should typically do this every couple of months because they can get dirty fast! So it’s good to get used to changing these pretty often. Especially in the summer months where they can get pretty dirty! During this time, they can collect allergens, dander, debris and even pet hair! Due to this, changing your filters often is a must, especially if there are people in your family that have allergies!

But how do you change air filters? Using the below steps, you’ll find it easy to change with my help below:

  1. Start off by turning turning off your furnace. This is important because if you don’t do this, then the furnace might turn on when you’re replacing the filters.
  2. Remove the side door of your furnace so that you can gain access to the air filters. When you do this, take a picture of how they were installed that way you can put them back in the way that they were when you reinstall them.
  3. Read the size of the filters. This is usually printed on the side of them. Usually they’ll have their length, width and thickness listed. Most of the time, these filters are 25x20x1. After you take them out, you’ll want to put new ones in. But if you don’t have any replacements on you, you can usually pick them up at a local hardware store.
  4. After getting the replacements, it’s time to replace the filters! This is simple and you can do this by following the arrows on the replacements.
  5. Close up the furnace doors and turn it back on! You’re all set!
These are typically when your air filters will look like! The one on the left is dirty while the one on the right is brand new and clean!

Stocking Up on Firewood

If you have a fireplace or wood-burning stove, you’ll know that it’s important to stock up on firewood. Usually in my family, we start getting firewood around early summer. This is important because this gives the wood time to dry out which makes it easy to burn. But, feel free to start stocking up whenever you’d like to!

You can even buy pre-dried firewood during the heating season. It might be a little pricier due to high demand or limited stock. But Home Depot, Lowes, Tractor Supply and even some gas stations will tend to have them in stock! However, if you’ve been doing this for a while, then you might have a log splitter! This gives you the ability to split wood! You don’t need to spend the money on it, just the time to chop and split the wood!

Gathering wood for the winter is a great way to keep yourself warm!

Splitting your own wood will save you so much money, especially if you have the time. But it’s also good to know that some types of wood is better than others. Oak is by far the best when it comes to chopping and burning. It’s not messy and it can take a while to burn. Unlike pine that’s very sappy and can take a while longer to dry. Birch is great as a fire starter because it burns quickly, but long term it doesn’t last very long.

Getting your Heating Oil Tank Inspected

As heating oil tanks get older, they tend to have general wear and tear over time. So it’s important to get them regularly inspected! Before heating season starts, you should get an inspection on your heating oil tank. This process doesn’t normally take very long, but it’s very important. If your tank is old, then it’s a good idea to get it replaced! This can take a couple of days but it’s worth it! Some places such as Home Depot and Lowe’s will normally have heating oil tanks in stock.

I’ll be briefly going over how to inspect your tank. However, if you want a more in-depth explanation, I recommend looking at my article about Tank Inspections.

  1. Inspect the base of the tank, making sure that all the legs are sturdy and have no visible leaks.
  2. Ensure the seams of the tank are rust-free.
  3. Inspect the sides and bottom of the tank for leaks.
  4. Check the oil line for any leaks.
  5. Ensuring the oil-filter has no leaks.
  6. Inspect the top of the tank and it’s fittings.
This is what an average heating oil tank. The numbered sections are the most common places that are inspected.

Getting a Tune-Up

Making sure that your system is in tip-top shape is important for it’s functionality. But to make sure that it’s working properly is important that your system doesn’t go down when you need it! If your system needs a tune-up, then it’s best to contact your local HVAC company. They’ll do a routine maintenance for you and help you make sure that your system is up to par with what it should be! But, these tune-ups will usually cost around $200-$400 depending on the type of system that you have.

But, when you contact your HVAC company, you should ask if they offer a regularly scheduled tune-up contract. These service contracts can help you stay on top of your system and can help you ensure that it’s functioning as it’s intended to. Some companies will even give you a discount on this contract, if you decide to sign up with them! Even if they’re repair and/or service only, you can still get some great heating oil prices using websites such as FuelSnap.

Your heating system should be tuned up and maintained frequently. It ensures that everything in your home runs smoothly.

Stocking Up on Heating Oil

If you’re running low, you’ll want to make sure you’re topped off before you enter the heating season. Having a supply of heating oil for when the season starts is very important. This will prevent you from running out and waking up to a cold house in the cold months of the year. If your tank is running low, or your at a half tank, this is the perfect time to get your tank topped off so that you can enter the heating season with a full tank.

Additionally, if you don’t have a reliable tank monitor or your current gauge is broken, then I would consider getting a Smart Oil Gauge! The Smart Oil Gauge will keep track of your tank’s level and monitor your usage data! You’ll have access to all of this information on your phone at the touch of a button! You can even order oil through the app on your phone with our FuelSnap integration! But, it’s important to know that the gauge functions off of a WIFI connection and not Bluetooth. So you will need a WIFI connection at the location of the Smart Oil Gauge.

This is a comparison of the Smart Oil Gauge and your average float gauge. The Smart Oil Gauge also is a lot more reliable.

Concluding Thoughts

By following the guides and methods I’ve mentioned above, you’ll be able to be prepared for heating season! Stocking up on wood and oil can help you in the long run! Plus, if you access to multiple of the above mentioned methods, then you’ll be all set! You’ll be able to implement everything above if possible! Temperatures will start to steadily decrease as well. So keep an eye on the temperatures so that you can make sure that you’re prepared for what’s to come!

Happy Heating,

Hunter

Heating Oil Vs Radiant Heat: Which is Better?

If you’re in the market for a new home or building one, you may be curious about Radiant Heat. This is a very popular form of heating that can warm your home very efficiently. However, it’s not something that can be added to your home later on. Because of this, usually you’ll want to install it during home construction. But if you’re in the market for a new home, then you might be considering a home with radiant heat.

But how does it compare to other forms of heating such as heating oil? In this blog post, I’ll be going in depth on radiant heating and how it compares to heating oil! I’ll be sure to go over everything that you need to know!

This is what radiant heat looks like under your floor. It’s very complex and intricate.

What’s Radiant Heat?

This is a form of heating that emits through electromagnetic waves. There are two common types of this and they tend to be known as conduction and convention heating.

The best example of Radiant Heat is heat that a fire produces. Meanwhile, an example of convection heat would be the heat that is produced from a heat vent. However, heat that emits based of touching something is known as conduction heat.

Now, radiant heating in your home can be a little bit different. It is located in the floors and walls of the home, and revolves around heated water running through special pipes. These tend to efficiently warm the home and keep those areas warm all day. How it works might sound a little strange, but it is a convenient and efficient way to heat the home. However, a big downside of it is that this cannot be added to your home. It can only be added during construction before the floors and walls are finished. This makes it not very easily accessible to existing home owners.

The Advantages of Radiant Heat

Luckily there are a lot of benefits for radiant heating. Here are only just a few if the benefits of using Radiant Heat:

  • Excellent Comfortability: Heat that’s provided from radiant heating is incredibly warm. This is because with radiant heat, the surface of the floor becomes very comfortable. This makes it easy to walk on especially during the colder winter months.
  • Divided Heat Distribution: When a radiant heat system produces heat, it’s evenly distributed throughout the home. This is so that your home can maintain a warm temperature throughout all hours of the day. But, forced hot air for example will only give you some patches of hot air and some cold.
  • Zoning Ability: A very useful tool that radiant heat has is the ability to zone. This means that you can customize and prioritize specific sections and rooms of the home to be warmer than others. This will give you complete customization over your home heating.

The Disadvantages of Radiant Heating

Now, while there are quite a few benefits for radiant heating, there are also some disadvantages:

  • Complexity: Unfortunately, the biggest downside to Radiant Heating is its complexity. It’s not simple at all and will require installation before the floors and walls of the home are complete. Additionally, it’s also very expensive to install in your home.
  • Difficult to Service: Due to being located underneath the flooring, getting radiant heat serviced can be difficult. But, most of these systems require a boiler room for servicing as well. So usually that is not an issue.
  • Usually Longer to Heat: With radiant heating, it heats the surface of the floor from underneath. This can cause the floor to take a little while longer to heat up. This makes it not-very ideal for secondary homes where you’re there in short bursts.
  • Professional Installation Required: To ensure that the system is constantly running smoothly and ensuring that there’s no problems in the future, it’s a requirement to have a professional install.
These heating systems must be installed by a qualified professional.

The Advantages of Heating Oil

When you compare heating oil to radiant heat, there are a couple of things that you have to look out for. The first thing to know is that heating oil is much more efficient than radiant heat. Heating oil burns much hotter than radiant heat, which ultimately makes the home much warmer. Heating oil also heats the home much faster compared to radiant heat. Radiant heat usually takes a little while to get going. Meanwhile, with heating oil, it’ll heat your home much faster.

Maintenance for heating oil is also much more accessible. This is due to the fact that most HVAC technicians are much more familiar with heating oil systems compared to radiant heating systems. Your Boiler or Furnace will also have a room in the home that’s completely dedicated to it. This gives those very same HVAC technicians easy access to what exactly they have to work on, as well as offering a faster diagnosis.

The Disadvantages of Heating Oil

The most frustrating downside to heating oil is how the prices fluctuate. While radiant heat doesn’t change pricing, heating oil does. Heating Oil prices are also affected by global crises. For example, when COVID-19 caused the country to lockdown, prices were down to $1 or below per gallon! While the opposite happened when Ukraine was invaded by Russia. Prices spiked up in price to above $4 a gallon. Additionally, the colder it is outside the more more heating oil is in demand. This also causes prices to go up.

You’ll also have to constantly monitor your usage and tank level when you burn oil. This is because if you don’t monitor your usage, you will run out of heating oil. This will ultimately result in you waking up to a cold house. This is not a fun experience. This can seriously damage your system, so it’s very important that you monitor your level with a tank gauge such as a Smart Oil Gauge or a standard float gauge. Either one of those will help protect your system from running out of heating oil.

This is your average heating oil tank. They tend to hold around 275 gallons for your common tank sizes.

How Does Radiant Heat Compare to Heating Oil?

Radiant heat is considerably less efficient than heating oil. While, yes you are saving on heating oil costs, it just doesn’t produce as much heat when comparing it to heating oil. The system should always be turned on to be able to heat your home. This is so that hot water is pushed through the special pipes efficiently. But, Radiant heat is also known to be allergy safe! Meaning that you don’t have to worry about any allergens being forced into the home like with hot air! This will be a monumental change for you and your children! Even your friends and family who have allergies don’t haven to worry about this upsetting their allergies.

But for heating oil, you’ll still need to remember to order oil every so often to ensure that you don’t run out. Heating Oil will also heat your home much faster than when comparing to radiant heat. However, you will also have to monitor your level consistently so that you don’t run out. Unlike with radiant heat, where you don’t have to pay attention to your level.

Is Radiant Heat Worth It?

If you are building a new home, or looking for a new one and are considering Radiant Heat, I highly recommend it! However, it’s important to know that it’s hard to get service and it’s expensive to install. However, this balances out by saving you money on heating oil costs. This can help you long term, considering how erratic heating oil prices can be.

But, if your home already has a boiler or furnace, then it’s really not worth the hassle of selling your home and buying/building a new one just to use this as a primary source of heating. You can still get cheap prices on heating oil using our FuelSnap program and all of our up-to date pricing on heating oil!

Happy Heating,

Hunter

Why do Heating Oil Prices Fluctuate?

One of the nice things about heating oil is that you can order it whenever you need! You are not at the mercy of your dealer and can order whenever! This also includes if you’re on an automatic delivery contract! If your next scheduled delivery isn’t for a while, then you can always order oil using FuelSnap or schedule a time with another local dealer to come out and deliver. But Heating Oil prices tend to change often. There are a few different reasons why they change, but I’ll be going over the major ones!

What Causes Price Fluctuations?

When deciding when to order heating oil, it’s important understand how the price fluctuations work! Prices can fluctuate for a variety of different reasons. But, the most common reasons usually consist of the following:

  • Crude Oil Supply and Demand
  • Supply and Demand of Local Dealers/Competitive Pricing
  • Call-by or Automatic Delivery

Crude Oil Supply & Demand

The biggest factor for pricing changes is based on supply and demand. While you might not think it would, crude oil prices have a big effect on the prices for heating oil. Heating Oil is apart of a group of oil known as crude oil. Aside from heating oil, crude oil tends to include jet fuel, gasoline, machinery lubricants and much more. These all are affected by changes in crude oil prices. It’s a base fuel and is used in the above mentioned fuel types.

When global prices change for crude oil, it affects all types of it. Weather the price decreases or increases, Heating Oil prices will change. This includes major global events. COVID-19 is the biggest example if this. This brought demand for crude down by a lot during lockdown. Nobody was flying or commuting to work which caused a massive oversupply of crude oil. This caused the pricings to drop significantly, which brought heating oil prices to an all-time low! During this time, some dealers had prices below a dollar per gallon!

This is the Fuel Crash of 2020 during COVID-19. In Mid to late April the price dropped drastically.

Now the exact opposite happened in early 2022 when Russia invaded Ukraine. This caused a massive increase in Heating Oil prices because we stopped buying Russian oil, which resulted in higher prices for gasoline and heating oil. Since then, prices have been slowly returning to normal. Back when this first happened, prices for gasoline averaged around $4-$4.50 per gallon in the northeast! Now the average price per gallon is around $3. While for heating oil, prices where around $5 per gallon!

Competitive Pricing for Heating Oil

This is another major factor in how heating oil prices shift. Long island is a prime example of how competitive pricing can effect heating oil costs per gallon. There are hundreds of heating oil dealers located in long island which will give you a lot of different options to chose from when it comes to getting heating oil. This makes some of the cheapest heating oil prices in the northeast located in long island.

This is what the price per gallons have looked like over the past few decades. Back in the late 2000s, prices reached $5 per gallon!

But, in areas with a lower population density, there tends to be much less choice when it comes to heating oil dealers. For example, the further north you go in New York, the less Heating Oil dealers there are available, and more propane dealers become available. This makes oil pricing in these less populated areas more expensive because there are fewer dealers available to give others competition. This will tend to give more expensive pricings for these areas. Dealers will often have control over the market in these areas so they can make the price per gallon whatever they’d like it to be.

Call-By or Automatic Delivery

Regardless of which you choose, the price will eventually change. However, whether or not you order by Automatic Delivery or when you need it will determine what price you’ll end up paying. But what price you are willing to pay is dependent on the prices that they offer you.

Automatic Delivery is a pretty popular way to order oil. You pay a certain amount every month, and the dealers will come out once a month to deliver you a certain amount of oil based on how much you’re burning. What they charge you and how much they’ll deliver depends on how much oil you burn a month and how much you can fit in your tank. Usually you can negotiate with the dealer if they offer you a price that you don’t like. However, some dealers will not negotiate. Automatic delivery tends to be more convenient but ultimately it’s more expensive.

Call-by delivery is another popular form of ordering oil. This is what we use on our FuelSnap website. This form of placing an order is only for when you need it. If you decide to go with this, then be aware that you’re going to have to pay more attention to your oil level and usage. But if you have a Smart Oil Gauge, then you won’t have to worry about running out! The device will keep track of what your level is and when you need oil! Additionally, ordering through Call-By only will let you choose from local dealers in your area and give you a larger pricing range to choose from! Call-by tends to be cheaper, but also requires you to stay on top of your usage and oil level.

Conclusion

There are many factors as to why heating oil prices change so much. But the above-mentioned reasons are the most common. Supply and demand are the most common, and as global events occur, this can affect the price fluctuation in oil. Similar to that, the population density of your area could affect the pricing. If more dealers come to your hometown, then that could positively affect your oil prices by making them lower.

Deciding weather or not you should order through automatic delivery or call-by will also determine how much oil per gallon is. While automatic delivery is more convenient it is more expensive. So if you’re willing to pay the extra money for peace of mind, then absolutely do it!

Finally, Call-by only is cheaper but does require being a bit more on-top of your usage and tank level. But, if you have a Smart Oil gauge then you won’t have to worry about running out! It keeps track of your heating oil level and usage, so that you know when to order! You’ll also be alerted when you need a fill and it has “FuelSnap” integration so that you can order directly from the app!

Happy Heating,

Hunter

Which Should You Use: Heating Oil vs Natural Gas

If you live in the northeast US, then you’re likely well aware of how important your heating oil service is, as well as which type you use. Small condos will typically use electric heat as their main source of heating. But the same can’t be said for larger homes. Electric heat is expensive enough as is, but in a large home, the cost to heat the home would be ridiculous! Instead, most homes of that size will resort to either heating oil or natural gas, which are more cost-effective. But which is better and which one should you go with? Well, I’ll be covering that here!

The Big Three

The three most well known and desired forms of heating are Heating Oil, Propane and Natural Gas. But they each have their own pros and cons when it comes to being your main source of heating oil. For example, if you want to use natural gas or propane you must have a gas stove at your home. That is also true if you use propane only for gas.

Natural Gas

This has become one of the more popular forms of home heating in recent years. But, it usually is only available in cities and downs that have a dense populous. This is because there is a network of pipes below ground that connects multiple buildings throughout the neighborhood. There’s a good way to determine if your neighborhood has these pipes by keeping an eye on road work. If the roads in your town are constantly being worked on and ripped up. This is so that the piping can be constantly worked on and maintained.

This is typically what a natural gas pump looks like. If you see this outside someone’s home or outside of a building, they likley re using natural gas for heat.

You can also tell by looking at the other homes on your street. If you look in the back or sides of their home, you’ll see that they might have what looks to be some kind of meter. This meter is their natural gas line. These tend to track and regulate how much natural gas flows into your home. Homeowners are then billed by the natural gas companies for using it. Luckily, natural gas tends to be pretty cheap.

But, this form of heating is much less common in areas where homes tend to be more spread out. This is because these pipes are hard to maintain in those areas. Some companies will actually lack clients in these less populated areas, making it not worth while for them.

Heating Oil

Heating Oil has quickly become one of the most popular forms of heating oil in the northeastern united states. It’s very reliable and puts out a large amount of BTUs when compared to propane. It is also much cheaper per gallon than propane is. But, the prices for heating oil tend to fluctuate a lot more than other sources of heating. However, heating oil can be reliably stored on your property, and it’s very safe to use! You will usually find these tanks located indoors or outdoors.

This is your average heating oil tank. You can find them inside your basement or garage. But they can even be found outside like above!

Additionally, because heating oil is so popular, you can find dealers everywhere! Now with all these different dealers available to you, this means that you’ll be able to shop around for the best price per gallon. You can look at local dealers in your area, as well as using websites such as “FuelSnap” to look to see what prices other dealers are offering. Unlike, propane you’ll have the freedom to order from who and where you want.

Propane

Propane is another popular form of heating. But it’s also very versatile. You can use it to heat your home, for hot water and even for cooking off the stove! Now, unlike natural gas, they are stored in large tanks that are usually somewhere on your property. These tanks can tend to be large, white and pill shaped. Propane is stored in these tanks as a form of “Liquid Propane”. These tanks also tend to be pretty ugly to look at.

Your average propane tank looks like this. They are usually kept away from the property for safety reasons.

The unfortunate thing about propane is that about roughly 95% of propane tanks are owned by propane dealers. This is a huge problem when it comes to heating with propane. This is because this prevents you from ordering propane when you need it as the homeowner. When you are renting a propane tank, the dealer decides when you get a delivery and nobody else can fill it! In some states its against the law! It also tends to be much more expensive than both natural gas and heating oil!

Choosing the Right Option

When deciding which one to use it’s important that you weigh in all the pros and cons to really think if this is something for you. Both heating oil and natural gas are fantastic ways to heat your home and they’re both relatively cheap! However, Natural Gas is usually owned by a utility provider, so it’s not as flexible as heating oil. However, it is not as restrictive as propane. Propane tends to be very restrictive, but it is still a great way to heat your home! Just be aware that it is still expensive.

But, if you’d rather not have to worry about ordering automatic delivery or constantly ordering oil when you need it, Natural Gas is for you! The nice thing about natural gas is that it will naturally flow into your home through ducts that connect to pipes in your neighborhood. It is cheap and reliable!

When using heating oil, it’s important to monitor your tank level and usage to ensure that you don’t run out. You can monitor this with a Float Gauge or a Smart Oil Gauge. Either way, you will have to monitor your usage in some way. But, you also cannot use Heating Oil to power a gas stove, gas fireplace or a generator.

What is the Best for You?

If you’re looking for a home and you find one with Natural Gas, then I highly recommend it! It’s cheap, reliable, and effective. It can run systems such as stoves, fireplaces and much more! Even some modern apartment complexes have it as a heat source!

But, if you don’t have access to natural gas then I would recommend using heating oil to heat your home! It is incredibly cost-effective and when you compare it to other forms of heating such as propane, you’ll find that you’re able to shop around when you order! Meaning that you can find the best prices available to you! You can do this by shopping around with local dealers or by using FuelSnap! Which puts all your local dealers in one convenient place!

Now, if you can’t get access to either natural gas or heating oil, then sticking with propane is still great! It can be expensive and restrictive, but if you live in an area that doesn’t have access to heating oil, then propane is your best bet! You can use it to heat your stove, fireplace, and much more! But if you do have access to heating oil or natural gas, then using propane alongside those puts you ahead of the game!

Happy Heating,

Hunter